glenn.imagepros
Secrets to Achieving a Perfect Smoke Ring in BBQ Competitions
Ever wondered what makes competition BBQ so special? It’s the pink ring under the meat’s surface, known as the smoke ring. This ring shows off a pit master’s skills. But how do you get this ring in your own BBQ? Let’s explore the science and techniques behind it.
This will make your BBQ stand out, impressing everyone with your skills.
Key Takeaways
- Understand the chemical reaction that creates the smoke ring
- Learn how to maintain the optimal temperature and moisture levels for smoke ring formation
- Discover the wood types and combustion methods that enhance smoke penetration
- Master the art of low and slow cooking to achieve competition-worthy results
- Leverage meat science principles to select the perfect cuts for a flawless smoke ring
What is a Smoke Ring?
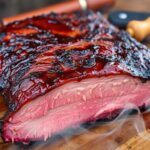
A smoke ring is a pink or reddish band that appears on smoked meats like brisket and pork. It’s a result of a chemical reaction between the meat’s myoglobin and smoke gases. These gases include nitric oxide (NO) and carbon monoxide (CO).
The Cause of a Smoke Ring
When smoke gases meet the myoglobin in the meat, they change its color. This keeps the meat pink. The smoke ring forms because these gases only go deep into the meat. This leaves the inside to cook and turn brown, while the outside stays pink.
The process of creating a smoke ring is complex. It involves the meat’s myoglobin reacting with smoke gases. This mix of elements gives smoked meats their unique look.
“The smoke ring is a visual cue that the meat has been properly smoked, and it also indicates that the meat has been exposed to the right combination of smoke, heat, and time.”
Learning about smoke ring formation helps you get it right in your BBQ. By understanding smoke, temperature, and meat, you can make perfect smoke rings every time.
Does a Smoke Ring Enhance Flavor?
In barbecue, the smoke ring is often seen as a mark of excellence. This pinkish-red ring forms below the meat’s surface, showing a well-smoked brisket or pork shoulder. But, the idea that a big smoke ring means the meat tastes better is a barbecue myth.
The visual appeal of smoke ring can make the meat look more appealing. But, it doesn’t actually make the flavor of the barbecue better. The smoke ring comes from a chemical reaction between the meat and smoke. It doesn’t affect the meat’s natural taste or quality.
In competition judging, the smoke ring is very important. Judges often look for a thick smoke ring to show the pitmaster’s skill. Even though the smoke ring doesn’t change the taste, it can affect how the meat is judged in a barbecue competition.
“The smoke ring is a beautiful visual indicator, but it doesn’t mean the meat will taste any better. It’s really just for show.”
The debate over the smoke ring flavor is ongoing in the barbecue world. Some believe it’s crucial, while others think the real test is the meat’s tenderness, juiciness, and flavor. This is true whether or not it has a vibrant smoke ring.
Factors Influencing Smoke Ring Formation
Getting a perfect smoke ring in BBQ isn’t just about the method. It’s also about several key factors. These include the meat’s myoglobin content, the cooking temperature, and the type of wood used. Knowing these can help you improve your smoked dishes.
Myoglobin Content
Myoglobin, a protein in muscle tissue, is key for smoke ring formation. Beef has the most myoglobin, making it great for a deep smoke ring. Pork and poultry have less, but older animals have more, leading to a deeper ring.
Meat Temperature
The meat’s temperature is also crucial. If it gets too hot inside, the myoglobin won’t react with the smoke compounds. This limits the smoke ring’s depth and color. Cooking low and slow lets the smoke fully interact with the myoglobin.
Wood Type and Combustion
The wood type and how it burns affect the smoke ring too. Hardwoods like oak and hickory make more NO and CO than softwoods. Lower burning temperatures help produce these compounds consistently. This lets them deeply penetrate the meat and react with the myoglobin.
“Understanding the factors that influence smoke ring formation is crucial for BBQ enthusiasts who want to take their game to the next level.”
Techniques for Achieving a Perfect Smoke Ring
Getting a beautiful smoke ring on your barbecued meats shows you know your stuff. Start with the right meat, like beef brisket or pork shoulder. These meats are full of myoglobin, which helps them take on the smoke’s color.
It’s important to cook at low and slow temperatures. High heat can ruin the smoke ring by changing the meat before the smoke can work its magic. Stick to temperatures between 225°F and 275°F for the best look.
Keeping the meat’s outside wet is key. Use a spray or brush with apple juice or broth to help the smoke stick and deepen the color. Cutting off extra fat helps the smoke get in better and makes the colors pop.
| Technique | Benefit |
|---|---|
| Choosing Meat with High Myoglobin | Primes the meat to absorb and showcase smoke’s hue |
| Maintaining Low and Slow Temperatures | Prevents myoglobin from denaturing before smoke penetration |
| Keeping the Meat Surface Moist | Helps smoke chemicals adhere and condense for a more distinct ring |
Use these tips, and you’ll soon be making smoke rings that wow everyone at your barbecues.
Perfect Smoke Ring for BBQ Competition
In competitive barbecue, the competition-level smoke ring is key. Judges look for a thick, even smoke ring to see if the meat was smoked right. This ring doesn’t change the taste but can influence judges who eat with their eyes first.
Pitmasters work hard to get a perfect smoke ring. It can mean the difference between winning or losing. Getting this ring right takes knowing how it forms and controlling the cooking time and temperature.
- Selecting the right cut of meat with a high myoglobin content
- Maintaining a low and slow cooking temperature to ensure the smoke has time to permeate the meat
- Keeping the meat surface moist throughout the cooking process to facilitate smoke absorption
- Carefully monitoring the temperature to ensure the meat never exceeds the critical point where the smoke ring formation stops
By using these techniques, pitmasters can make meats with a competition-level smoke ring. This will impress judges and give them an edge in BBQ competitions.
Fuel Selection for Optimal Smoke Ring Formation
Choosing the right fuel is key to getting that perfect smoke ring in your BBQ. Charcoal briquettes and hardwood are top choices for pitmasters who want to boost nitric oxide (NO) production. This is what gives the meat that distinctive pink color.
Charcoal briquettes and hardwood chunks or chips are great together. They create the right mix of nitric oxide and carbon monoxide (CO). This mix is what makes the smoke ring look amazing. Gas and electric smokers often can’t make enough of these gases, so your meat might not get that beautiful smoke ring.
Charcoal Briquettes and Hardwood
For the best smoke ring, mix high-quality charcoal briquettes with hardwood fuel selection for smoke ring. The briquettes give steady, long heat, and the hardwood adds a smoky flavor and nitric oxide for the smoke ring.
“The secret to a show-stopping smoke ring lies in the fuel you choose. Charcoal briquettes and hardwood are a winning combination, delivering the perfect balance of heat, smoke, and nitric oxide production.”
Learning how to pick between charcoal vs. hardwood will help you make BBQ that looks and tastes amazing. The secret to a perfect smoke ring is choosing the right fuel.
Monitoring Meat Temperature for Smoke Ring Growth
Getting the perfect smoke ring in BBQ is an art that needs careful temperature control. The secret to a vibrant, well-defined smoke ring is to watch the meat’s internal temperature closely while it cooks.
The smoke ring gets bigger as the meat stays below a certain temperature. This temperature is around 170°F for beef. At this point, the myoglobin, which gives the ring its pink color, starts to break down. This means the smoke ring stops growing.
To get the biggest smoke ring, take the meat off the smoker before it hits this critical temperature. Many BBQ experts wrap the meat in butcher paper or foil at 160-165°F. This keeps it moist and stops the smoke ring from fading too soon.
| Meat Temperature | Smoke Ring Growth |
|---|---|
| Below 170°F | Smoke ring continues to expand |
| Above 170°F | Smoke ring stops growing as myoglobin denatures |
By keeping an eye on the meat’s temperature and using the right techniques, you can make your BBQ smoke ring stand out. This will impress BBQ judges and fans everywhere.
Controlling Bark Formation for Enhanced Smoke Penetration
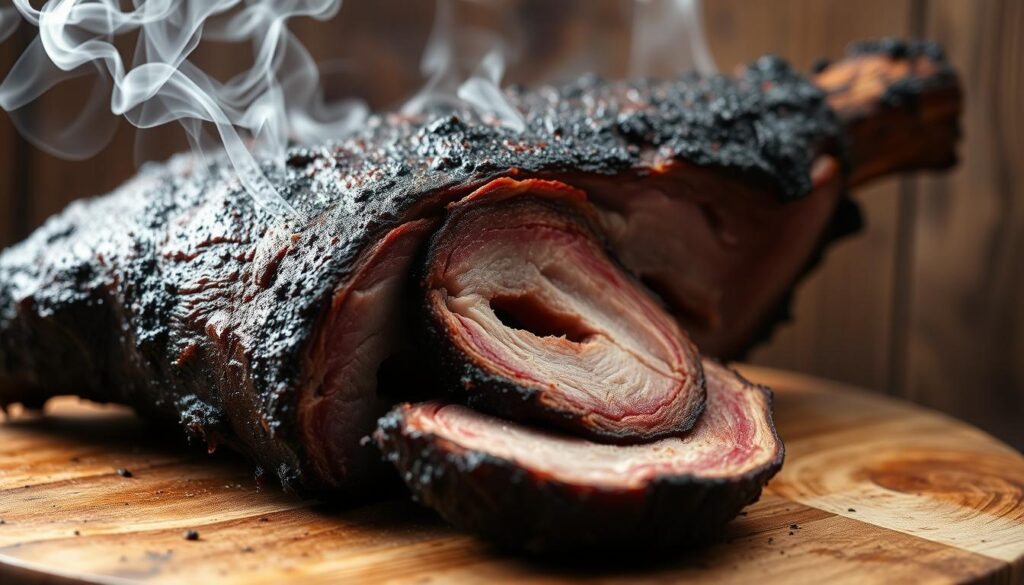
A thick bark on meat can block smoke gases from getting in. Seasoned pitmasters use smart tricks to delay bark formation. This lets more smoke get into the meat, making it taste better.
Delaying Bark Formation
One way to do this is by keeping the meat moist. You can spray or mop it often. This slows down the drying of the outside, which helps delay bark formation.
Wrapping the meat in butcher paper or foil after some bark forms also works well. It keeps moisture in and stops more bark from growing. This lets the smoke keep getting into the meat.
Learning how to control bark formation is key to a great smoke ring. It makes your smoked food look and taste amazing. This is important if you’re in a BBQ competition.
| Technique | Benefit |
|---|---|
| Frequent Spritzing or Mopping | Slows the drying and hardening of the exterior, delaying bark formation |
| Wrapping in Butcher Paper or Foil | Traps moisture and prevents further bark development, enabling ongoing smoke absorption |
Using these methods to manage bark formation and delay bark development is smart. It helps create a stunning smoke ring. This will surely impress any BBQ judge.
Electric Smoker Hacks for Achieving a Smoke Ring
Getting a perfect smoke ring with an electric smoker can be tough. These smokers don’t create the same smoke gases as charcoal or wood-fired ones. But, there are some workarounds for electric smokers to help you get a good smoke ring.
One good trick is to put a little charcoal or hardwood in the smoker’s wood chip tray. This can make more smoke gases, like those from traditional smokers. Another trick is to use a curing salt with sodium nitrite. This can make the meat look like it has a real smoke ring in electric smoker.
- Incorporate charcoal or hardwood chunks in the wood chip tray to boost smoke gas production.
- Utilize a curing salt with sodium nitrite to artificially create the smoke ring effect.
With these smart tricks, even those who use electric smokers can get a smoke ring that looks amazing. It will impress your guests and other barbecue fans.
“With a few simple tricks, you can coax an electric smoker to produce a smoke ring that rivals the best charcoal or wood-fired units.”
Conclusion
The smoke ring is key to expertly smoked meats, especially in barbecue competitions. Its visual appeal adds to the meat’s quality and the pitmaster’s skill. Even if its taste impact is debated, the smoke ring’s look matters a lot.
Learning how smoke rings form helps you get a perfect one. It involves myoglobin, wood type, and how the wood burns. To get it right, keep the meat at low and slow temperatures. Also, keep the meat moist and choose the right fuel.
This guide gives you the tips you need to impress at your next barbecue. With these insights, you’ll make your smoked meats stand out. You’ll see the importance of smoke ring and how to get it perfect for amazing results.
FAQ
What is a smoke ring?
A smoke ring is a pink or reddish band seen in smoked meats. It’s common in brisket, pork, and other cuts. This ring comes from a chemical reaction between the meat’s myoglobin and smoke gases.
What causes a smoke ring?
Smoke gases can only go so deep into the meat. This leaves the inside to cook and turn brown. The outer layer stays pink, thanks to the meat’s myoglobin and smoke gases.
Does a smoke ring enhance the flavor of the barbecue?
No, the smoke ring doesn’t improve the meat’s taste. It’s just for looks. Many think a thick smoke ring means the meat tastes better, but that’s not true.
What factors influence the formation and thickness of the smoke ring?
Many things affect the smoke ring, like the meat’s myoglobin level and cooking temperature. Beef has lots of myoglobin, making it great for smoke rings. Using hardwoods and lower cooking temperatures also helps.
What techniques can pitmasters use to achieve a perfect smoke ring?
Pitmasters can use several methods for a great smoke ring. Start with meat rich in myoglobin, cook low and slow, keep the meat moist, and trim fat for better smoke penetration.
Why is the smoke ring important in competitive barbecue?
In competitive barbecue, the smoke ring shows a pitmaster’s skill. A thick, even ring impresses judges, suggesting the meat was smoked perfectly. It doesn’t affect taste but can influence judges’ opinions.
How does the type of fuel used in the smoker or grill affect the formation of the smoke ring?
The fuel type affects the smoke ring. Charcoal and hardwood produce lots of nitric oxide, key for the smoke ring. Lump charcoal, gas, and electric smokers don’t make enough NO and CO for a good smoke ring.
How do pitmasters monitor the meat temperature to maximize the size of the smoke ring?
The smoke ring grows until the meat hits 170°F. Pitmasters wrap the meat in paper or foil at 160-165°F to keep it moist and help the smoke ring grow.
How can pitmasters control bark formation to enhance smoke penetration and smoke ring development?
A thick bark can block smoke penetration. Pitmasters use spritzing or wrapping the meat to delay bark formation and improve smoke ring development.
How can electric smoker owners create a smoke ring?
Electric smokers make smoke rings hard to get. But, you can use a bit of charcoal or hardwood in the smoker or curing salt with sodium nitrite to enhance the color.
How to Maintain Consistent Temperature in Your Smoker
Have you ever had a brisket that was dry and tough because of uneven heat? Keeping the right temperature while smoking is key to getting delicious, tender results every time. But how do you control the temperature in your smoker?
This guide will teach you how to manage your smoker’s temperature. You’ll learn about the factors that affect it and how to adjust vents for consistent heat. With these tips, you can make restaurant-quality smoked meats in your backyard. Get ready to wow your family and friends with amazing smoked dishes.
Key Takeaways
- Understand the importance of consistent temperature for achieving the perfect smoky flavor and texture in smoked meats.
- Learn how to control the airflow, fire intensity, and smoke consistency in your smoker to maintain the desired temperature.
- Discover the secrets to using water pans and monitoring smoker temperature accurately for optimal results.
- Explore fuel management techniques, including understanding the burning properties of different wood types, to keep your smoker at the right temperature.
- Understand the relationship between smoke color and flavor, and learn how to achieve the ideal thin, bluish smoke for maximum tastiness.
Understanding Temperature Control in Smokers
Keeping the temperature steady is key to perfect smoked meats. If the temperature changes, it can ruin the cooking. To get it right, know what affects the heat.
Importance of Consistent Temperature for Smoked Meats
For great smoked meats, consistency is key. If the temperature changes too much, some meat might cook too much or not enough. This messes with the flavor and texture.
Factors Affecting Smoker Temperature: Airflow, Fire Intensity, and Smoke Consistency
Three main things affect your smoker’s temperature: airflow, fire intensity, and smoke consistency. Getting these right helps keep the temperature steady and right.
- Airflow: Air moving through your smoker helps control the temperature. Good airflow means better combustion, which affects the heat.
- Fire Intensity: How hot the fire is in your firebox changes the heat. You need to control the fuel to keep the temperature even.
- Smoke Consistency: The smoke’s quality affects the temperature too. You want thin, blue smoke for the best flavor and temperature.
By managing these factors, you can control your smoker’s temperature. This leads to delicious, perfectly cooked smoked meats every time.
Preparing Your Smoker for Temperature Control
Before you can effectively control the temperature in your smoker, make sure it’s clean and well-kept. Start by cleaning the firebox, getting rid of any soot and grease. This boosts airflow and makes combustion better.
Cleaning and Prepping the Firebox
It’s key to clean the smoker firebox regularly for good temperature control. Here’s how to prep your firebox:
- Brush out any ash or debris, ensuring the firebox is clear of obstructions.
- Use a stiff wire brush to scrub the interior walls, removing built-up creosote and grease.
- Wipe down the firebox with a damp cloth to remove any remaining residue.
- Check the firebox for damage or wear, and fix it before your next use.
Using a Chimney Starter for Efficient Coal Ignition
Lighting your charcoal or wood is key to achieving consistent temperature in your smoker. A chimney starter makes it easier and more efficient:
- Fill the chimney starter with your preferred charcoal or wood chunks.
- Put the chimney starter on a heat-resistant surface, like a grate or fireproof mat.
- Light the fuel at the bottom of the chimney with a long match or fire starter.
- Wait for the fuel to light fully and get to the right temperature before moving it to your smoker’s firebox.
By using a chimney starter, you get a consistent and reliable fire ignition. This makes it easier to control the temperature in your smoker during cooking.
Mastering the Art of Vent Adjustment
Adjusting the intake and exhaust vents on your smoker is key to keeping temperatures steady and getting perfect smoked meats. The intake vent lets oxygen into the firebox to fuel the fire. The exhaust vent lets out hot air and gases. Finding the right balance between these vents is crucial for good combustion and temperature control.
Role of Intake and Exhaust Vents in Temperature Regulation
The intake vent controls how much oxygen gets to the fire, which affects the flames and smoker temperature. By adjusting it, you can keep the heat steady for smoking. The exhaust vent helps control the release of hot air and smoke, which also impacts the temperature. By balancing these vents, you create a stable environment for smoking, leading to consistent and tasty results.
Balancing Oxygen Flow for Optimal Combustion
- The intake vent should be open enough for efficient burning but not too much to avoid a fierce fire.
- Adjust the exhaust vent to let the right amount of hot air and smoke out, keeping the smoker at the right temperature.
- Try different vent settings to find the balance that keeps your smoked meats at the desired temperature.
Mastering vent adjustment lets you control your smoker’s temperature for consistent, tasty results every time. Remember, the smoker vent adjustment, intake vent for smokers, exhaust vent for smokers, and oxygen flow in smokers are key to temperature control and good combustion.
Maintain temperature in smoker
Keeping the perfect temperature in your smoker is key to delicious smoked meats. Whether you’re an expert or new to smoking, learning how to maintain smoker temperature is crucial. We’ll explore ways to adjust smoker temperature and troubleshoot smoker temperature issues for great results.
Using vents is a main way to keep your smoker at the right temperature. By controlling the intake and exhaust vents, you can manage airflow and temperature. Make sure the oxygen flow is right to affect the fire’s strength and the temperature.
- Adjust the intake vent to control the air going into the smoker, which changes the fire’s strength.
- Watch the exhaust vent to make sure smoke and heat leave properly, keeping the temperature steady.
- Try different vent positions to find what works best for your smoker and the meat you’re cooking.
Choosing the right fuel and adding it as needed is also important for maintaining smoker temperature. Different woods burn at different rates and produce various heat levels. Knowing about these can help you pick the best wood to keep your temperature steady.
| Wood Type | Burn Time | Heat Output |
|---|---|---|
| Hickory | Long | High |
| Oak | Medium | Medium |
| Maple | Short | Low |
It’s important to keep an eye on your vents and fuel to keep the temperature right. By getting good at this, you’ll make consistently tasty smoked meats that everyone will love.
Using Water Pans for Temperature Stabilization
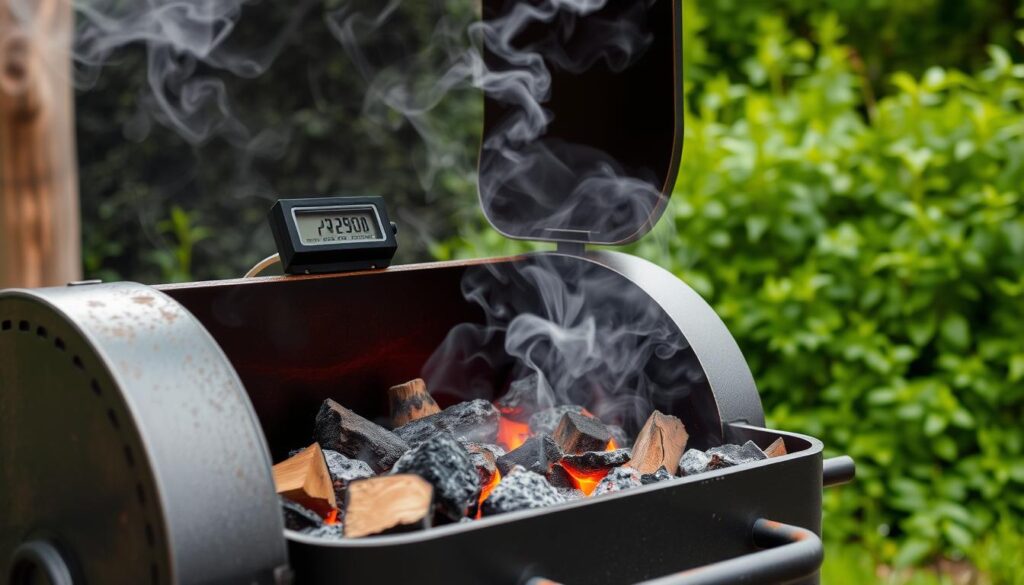
Keeping a steady temperature is key to smoking meats right. Using water pans helps with this. They create an even heat by acting as an indirect heat source. This stops hot spots and keeps the meat cooking evenly.
When water in the pan evaporates, it also keeps the smoker’s humidity steady. This moisture is great for keeping smoked meats juicy and tender. Water pans for smokers work like a heat sink, slowly releasing heat to keep the temperature steady.
Put the water pan right under your meat for best results. This lets the indirect heat in smokers cook your food gently from below. Check the water often and add more as needed to keep the temperature steady.
“Using a water pan is one of the best ways to achieve that elusive balance of smoke, heat, and moisture in your smoker.”
Try different water levels and positions to find what works best for your smoker and taste. Learning how to use water pans can take your smoked meats to the next level of flavor and tenderness.
Monitoring Smoker Temperature Accurately
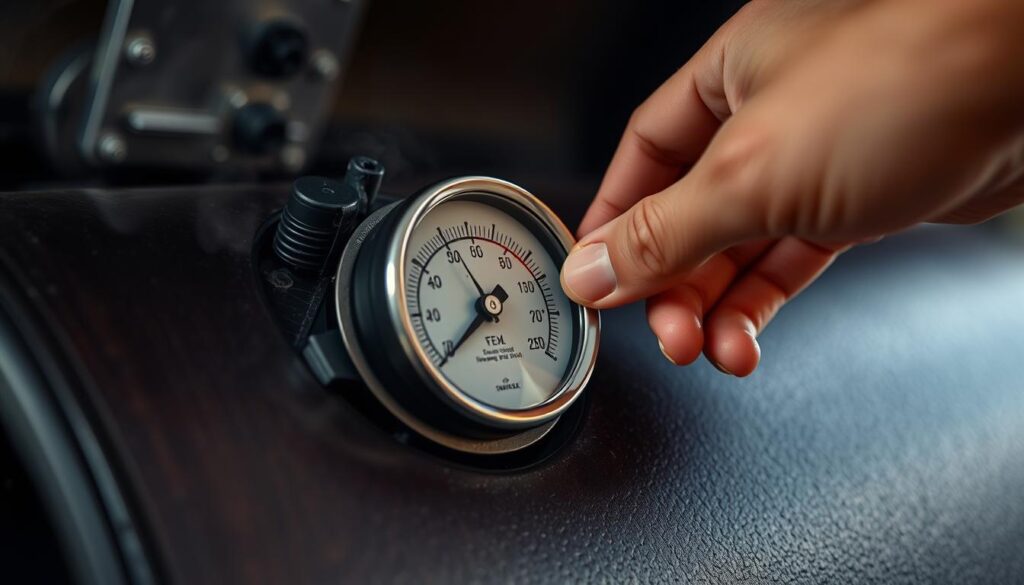
Keeping the temperature steady is crucial for delicious smoked meats. Many smokers have thermometers built in, but they might not be precise enough. By following a few simple steps, you can make sure your smoker’s temperature is spot on. This lets you adjust things as needed and keep your food perfect.
Calibrating Built-in Thermometers
To get accurate temperature readings, start by calibrating your smoker’s thermometer. These thermometers can lose their accuracy over time. Calibrating them is easy:
- Boil water and put the thermometer in, making sure it doesn’t touch the pot’s bottom.
- Wait for the temperature to settle, then check the reading. At sea level, water boils at 212°F (100°C).
- If the reading is off, adjust the thermometer as the maker suggests to get it right.
Using Dedicated Thermometer Probes for Precise Readings
Calibrating your built-in thermometer is a good first step. But for the most accurate readings, use dedicated thermometer probes. These tools can be placed in your smoker to give you detailed temperature info. This lets you adjust the heat to keep your food just right.
| Thermometer Type | Accuracy | Ease of Use | Portability |
|---|---|---|---|
| Built-in Smoker Thermometer | Moderate | High | Low |
| Dedicated Thermometer Probe | High | Moderate | High |
Using a calibrated built-in thermometer and dedicated probes will help you master smoker thermometer calibration and accurate temperature monitoring in smokers. This combo is essential for consistently tasty smoked meats.
Fuel Management for Temperature Control
Keeping a steady temperature in your smoker is key for perfect flavor and texture in smoked meats. The type and amount of fuel you use play a big role in controlling the temperature. Different wood types for smokers and charcoal types burn at different rates and temperatures. Knowing how they burn is important for managing fuel in smokers.
Understanding the Burning Properties of Different Wood Types
Each wood type has its own burning traits that can change the temperature and flavor of your smoked meats. Here’s a quick look at some popular woods and their burning traits:
- Hickory – Makes a strong, bold smoke flavor and burns hot and steady.
- Mesquite – Burns very hot and gives a unique, slightly sweet flavor.
- Oak – Gives a mild, classic smoke flavor and burns at a medium temperature.
- Maple – Offers a subtle, sweet smoke and burns at a relatively low temperature.
Replenishing Fuel for Long Smoking Sessions
For longer smoking times, you’ll need to add fuel to your smoker to keep the temperature right and the fire strong. This might mean adding more charcoal, wood chunks, or a mix of both, based on your smoker. Always check the fire and fuel levels and add more as needed for a steady smoke.
“Mastering fuel management is key to perfect temperature and flavor in smoked meats. Try different wood types and charcoal to find the best mix for your smoker and taste.”
Smoke Color: The Key to Flavorful Smoking
The color of smoke from your smoker is key to tasty smoked meats. Many think more smoke means more flavor, but that’s not true. Thick, white smoke can make your meat taste bitter. Aim for a thin, bluish smoke for a delicate flavor.
Understanding the Relationship Between Smoke Color and Flavor
The smoke color tells you a lot about your meat’s flavor. Smoke color in smokers shows the quality of the smoke. Thin, bluish smoke means a clean burn, giving a mild, refined smoke flavor in smokers.
On the other hand, thick, white smoke means the burn is not complete. This can make your meat taste harsh and overpowering.
Techniques for Achieving Thin, Bluish Smoke
- Start with high-quality, well-seasoned wood chips or chunks that are free of moisture.
- Use a chimney starter to efficiently ignite your charcoal or wood, ensuring a clean, consistent burn.
- Carefully manage the airflow in your smoker by adjusting the intake and exhaust vents to maintain the ideal oxygen-to-fuel ratio.
- Replenish your fuel source as needed, keeping a steady, even temperature throughout the smoking process.
- Experiment with different wood varieties to find the perfect balance of achieving thin blue smoke in smokers and complementary flavor profiles.
By understanding smoke color and flavor, and using the right techniques, you can make smoked meats full of delicious flavors.
Conclusion
Keeping your smoker at a steady temperature is key to making delicious, flavorful meats. You need to know how things like airflow and fuel affect the temperature. By learning how to manage these, you can control the temperature in your smoker.
Using the right techniques helps a lot. This includes managing vents, using water pans, and checking your thermometers. These steps help you get the perfect temperature and smoke for your food.
As you get better at controlling your smoker’s temperature, your smoked meats will get better. You’ll make everything from tender briskets to juicy ribs perfectly. Just follow the advice in this article to improve your BBQ skills.
Learning to control the temperature takes time and practice. Be patient and keep trying new things. With effort, you’ll get great at it. Soon, you’ll be making smoked dishes that everyone will love.
FAQ
What are the key factors that affect the temperature in a smoker?
Airflow, fire intensity, and smoke consistency are the main factors. They all play a big role in the smoker’s temperature.
How can I prepare my smoker for better temperature control?
Start by cleaning the firebox well. Remove soot and grease. Then, use a chimney starter for a consistent fire.
How do I adjust the vents on my smoker to maintain the desired temperature?
Adjust the intake and exhaust vents carefully. This balance is key for a steady temperature and good combustion.
How can I use a water pan to help stabilize the temperature in my smoker?
Add a water pan to create indirect heat. It helps prevent hot spots and keeps the cooking environment even. The water also helps control humidity, which aids in temperature stability.
How can I ensure I’m accurately monitoring the temperature inside my smoker?
Use a calibrated thermometer instead of the built-in one. Also, thermometer probes in key spots give precise readings.
How does the type and quantity of fuel I use affect the temperature in my smoker?
Different woods and charcoal types burn at varied rates and temperatures. Knowing their properties is crucial. For long smokes, add fuel as needed to keep the temperature right.
How does the color of the smoke coming from my smoker affect the flavor of the meat?
Thick, white smoke can taste bitter and bad. Aim for thin, bluish smoke for a delicate, flavorful result.
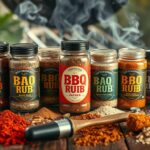
Creating the Perfect BBQ Rubs for Competition Success
Are you ready to boost your competitive barbecue skills? Making the perfect BBQ rubs is key to amazing flavors and tender meat that judges will love. But what makes top-level rubs stand out? We’ll explore how to make spice blends that take your smoked meats to the top and help you win at barbecue.
Key Takeaways
- Mastering the balance of flavors is crucial for creating award-winning BBQ rubs
- Layering complexity through strategic ingredient combinations can elevate your rubs
- Developing a repeatable process for recipe development is key to consistent success
- Fine-tuning your rub recipe through incremental adjustments can make all the difference
- Proper preparation and organization are essential for executing your rub strategy during competition
The Importance of Flavor in Competition BBQ
In competitive barbecue, flavor is the top score category. To win, you need a well-balanced, multi-dimensional barbecue flavor profile. This means mixing sweet, salty, and heat for a taste that changes with each bite.
Crafting a Well-Balanced Flavor Profile
Creating top-notch competition-level seasoning blends is key. Your multi-dimensional BBQ rubs should please many tastes. They should be appealing and interesting. To get this right, know how flavors work together to make your barbecue stand out.
Layering Flavors for a Captivating Experience
Flavor layering is a top trick for winning pitmasters. By adding flavor layering techniques, you make a captivating BBQ taste experience. The flavors should grow and change with each bite, leaving a strong impression on the judges.
“The key to winning a BBQ competition is creating a flavor profile that is both unique and universally appealing.”
Remember, in competitive barbecue, flavor is everything. Mastering barbecue flavor profiles and multi-dimensional BBQ rubs will help you win over the judges and get you on the podium.
Mastering Tenderness for Competition Success
Getting your BBQ meats to the perfect tenderness is key to winning. Whether you’re cooking chicken, ribs, pork, or brisket, making sure each piece is juicy and falls off the bone is crucial. In competitive BBQ, where tenderness is a big deal, knowing how to cook at a pro level can really help.
For tender competition BBQ chicken, aim for skin that you can bite through and meat that’s not dry. Ribs should come off the bone easily, leaving a neat bite mark. Pork should be almost too tender, and tender brisket should pull apart without falling apart.
Getting better at these skills takes practice and keeping an eye on the temperature. Mastering tender chicken, ribs, pork, and brisket will help you impress the judges and win the competition.
“The secret to tender competition BBQ is in the details – from your seasoning to your cooking time and temperature. It takes dedication and a deep understanding of each meat to achieve that perfect texture.”
Appearance: The Visual Appeal of Your BBQ Entry
Even though appearance counts for less in competition BBQ, it’s still crucial. A clean, symmetrical look that makes you hungry is key. You need perfectly trimmed and seasoned meats and a shiny finish that makes judges eager to taste.
Details matter, from opening the packaging to closing the box. This focus on visuals can make your BBQ stand out.
Achieving a Clean and Symmetrical Presentation
Your BBQ’s look starts with a clean, symmetrical setup. Trim meats carefully for even shapes and sizes. Season them well with your special rubs to boost the visual appeal of competition BBQ.
Arrange your items neatly and pay attention to how they fit together. This clean and symmetrical BBQ presentation will catch the judges’ eyes.
Creating a Mouth-Watering Shine
Finish your BBQ with a mouth-watering shine that judges can’t ignore. Use glazing, basting, and saucing for a glossy look. This, combined with perfectly cooked meats and great seasoning, will make your BBQ look amazing.
“The secret to a successful competition BBQ entry is not just in the flavors, but in the way it presents itself to the judges. Every detail matters when it comes to creating a visually stunning display.”
Organization: The Key to Successful Competition BBQ
Organization is key in competition BBQ. The work starts before the event, with lots of advance preparation at home. This helps reduce tasks at the event and keeps things stress-free. Tasks like trimming meats, making sauces, and setting up the truck or trailer are crucial before the competition.
Using mise en place during the event is also vital. This French term means “putting in place.” It helps you stay organized and ready for anything unexpected. With everything prepped and within reach, you can focus on cooking and follow your plan well.
Preparing in Advance for a Stress-Free Event
- Trim and prepare meats several days before the competition
- Make your sauces, rubs, and injections ahead of time
- Organize your competition rig, making sure all equipment is packed and easy to find
- Have a detailed timeline and checklist to stay on schedule
Mise en Place: Staying Organized During Crunch Time
- Set up your workstation with all ingredients and tools close by
- Label and pre-portion spices, sauces, and other items for quick use
- Follow a step-by-step process for each dish to avoid missing anything
- Keep your workspace clean and organized to avoid chaos
Mastering organized competition BBQ prep and mise en place techniques leads to success in competitive barbecue. These pre-competition organization tips make for a stress-free event. They let you focus on giving the judges the best BBQ experience.
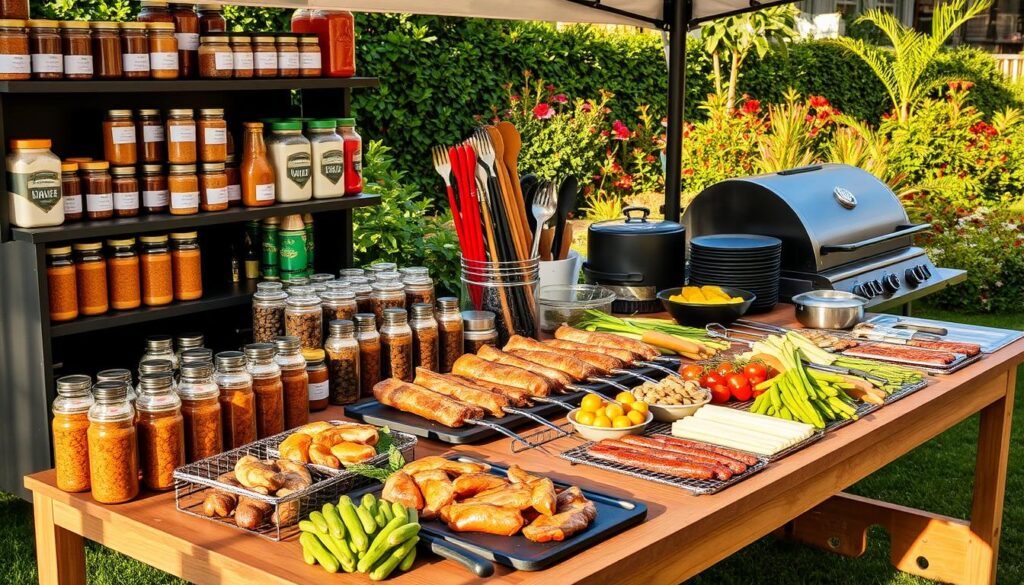
Developing the Perfect BBQ Rubs for Competition
Creating a BBQ rub for competition can be both rewarding and challenging. You can either start fresh or use an existing recipe as a base. The key to success is documenting your journey carefully.
Starting from Scratch or Building on Existing Recipes
There are two ways to make the perfect BBQ rub: start from scratch or use an existing recipe. Starting fresh lets you mix bold flavors and create a unique rub. But, it takes a lot of testing and patience. On the other hand, using an existing recipe gives you a good starting point. You can then adjust the flavors to fit your taste and competition needs.
Documenting Your Recipe Development Journey
It doesn’t matter how you start, documenting your process is crucial. Keep track of every ingredient, how much you use, cooking times, and what it tastes like. This helps you repeat your successes and learn from mistakes. It also helps when you need to tweak your recipe or make it again for future contests.
| Starting from Scratch | Building on Existing Recipes |
|---|---|
| Allows for unique flavor combinations | Provides a solid foundation to build upon |
| Requires more experimentation and patience | Enables fine-tuning of existing flavors |
| Produces a truly distinctive rub | Can save time in the development process |
“The secret to a winning BBQ rub lies in your ability to document and refine the development process. Every tweak, every tasting note, and every adjustment brings you one step closer to competition success.”
BBQ Rubs for Competition: Fine-Tuning Your Recipe
Making the perfect competition BBQ rub is like an art. It takes patience, dedication, and a lot of testing. After you have a good base for your rub, it’s time to make it better. Change one thing at a time and keep track of how it affects the taste.
Modifying One Ingredient at a Time
When tweaking your BBQ rub, it’s best to do it little by little. Begin by changing the amounts of spices, herbs, and seasonings you use. PS Seasoning has many top-notch rub ingredients to help you get the flavor just right.
Tracking Your Progress and Making Adjustments
It’s crucial to keep an eye on how your rub is coming along. Write down every change you make and how it tastes. This way, you can make smart changes to turn a good rub into a winner.
“The key to creating a competition-worthy BBQ rub is in the fine-tuning. Modify one ingredient at a time, and track your progress to ensure you’re making the right adjustments.”
Perfecting your BBQ rub is a journey of learning and trying new things. By changing one ingredient at a time and keeping track, you can make the right tweaks. This will help you create a rub that will wow the judges and boost your competition skills.
Competition BBQ Timelines and Checklists
Successful competition BBQ requires careful planning and organization. Start a full week before the event to ensure a stress-free day. This guide will help you stay on track with tasks like ordering meats and mixing rubs. This way, you can focus on doing your best at the competition.
Preparing for the Big Day: A Week-by-Week Guide
Timing is key in competition BBQ. Use this checklist to get ready to impress the judges:
- One week out: Order specialty meats and prep your rubs and sauces. Keep track of your recipes for later.
- Five days out: Plan your cooking schedule and check your equipment. Make sure everything is ready.
- Three days out: Trim and prepare your meats. Get your rubs, sauces, and other preps ready.
- One day out: Pack your gear and double-check your lists. Get a good night’s sleep before the big day.
- Competition day: Arrive early and stay organized. Stick to your plan and enjoy the day!
This step-by-step guide helps you avoid missing any important details. With a solid plan, you can focus on perfecting your recipes. This way, you’ll be ready to win.
The Ultimate Competition BBQ Checklist
Hosting a successful competition barbecue event takes careful planning. A detailed competition BBQ checklist is key to not missing anything important. It includes everything from grills and cooking gear to dry rubs, sauces, and tools to stay organized.
Going over this list carefully and checking it often helps avoid missing something crucial. It ensures a smooth, worry-free competition. This guide covers everything from cooking tools to personal items, keeping you focused and ready to perform your best.
- Grills, smokers, and other cooking equipment
- High-quality meat and seafood cuts
- Dry rubs, sauces, and seasonings
- Coolers, ice, and beverages
- Preparation and organization tools (cutting boards, knives, timers, etc.)
- Cleaning supplies and personal hygiene items
- Shelter, seating, and entertainment for your team
- Appropriate clothing and protective gear
Planning and packing your BBQ checklist carefully lets you focus on doing your best. With this guide, you’re set for success in competition BBQ.
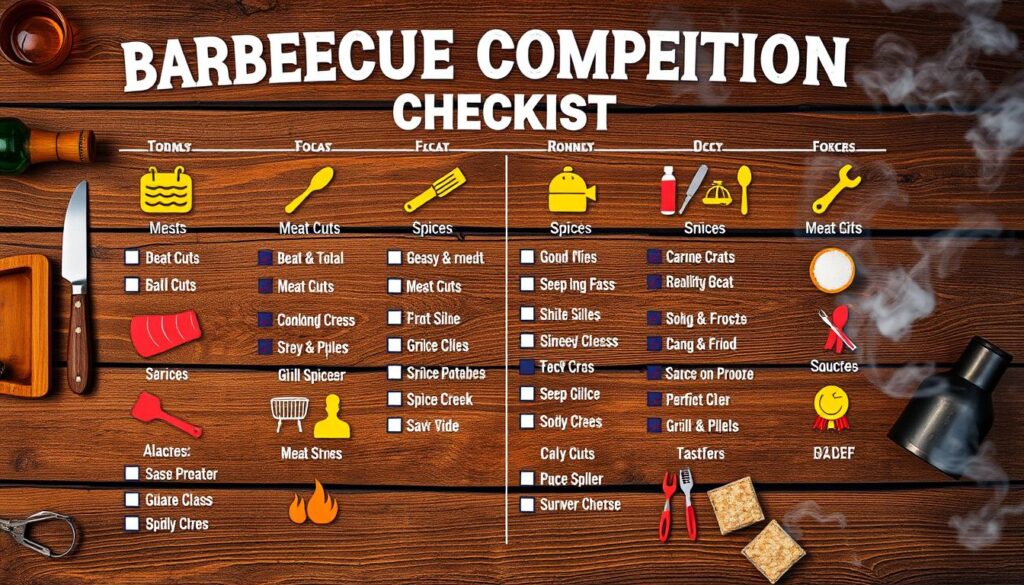
“Preparation is the key to success in any competition, and a well-crafted BBQ checklist is the foundation for a winning performance.” – Pit Master Extraordinaire
Conclusion
Your journey to make the perfect BBQ rubs has been exciting. You’ve learned about flavor, tenderness, and how to make your BBQ look great. Now, you’re ready to win in competitions.
You’ve worked hard on your recipes and kept track of your progress. You know what it takes to do well in BBQ competitions. Your skills in adding flavors and keeping your BBQ neat will help you win more.
For your next competition, use what you’ve learned and be confident. Trust your process and let your love for making great BBQ rubs lead you to success. The journey is tough, but with your skills and dedication, you’re ready to impress everyone.
FAQ
What are the key elements for creating championship-winning BBQ rubs?
To make top BBQ rubs, balance flavors well. Add layers of complexity and make meats tender and look great.
How can I achieve the perfect flavor profile for competition BBQ?
For perfect BBQ flavor, mix sweet, salty, and heat well. Layer these flavors for a taste that everyone loves.
What techniques can I use to ensure my BBQ meats have the optimal texture?
For great BBQ meat texture, focus on perfect skin and moist meat. Ribs should come off the bone easily. Brisket should be tender but not too soft.
How can I create a visually stunning competition BBQ entry?
Make your BBQ look great with clean, even presentation. Use perfectly seasoned meats that shine and look tempting.
What are the keys to staying organized during a BBQ competition?
Stay organized by prepping at home and using mise en place. Keep detailed timelines and checklists to avoid missing anything important.
How can I develop the perfect competition-worthy BBQ rub?
Start with a new rub or improve an old one. Keep track of every change, including ingredients and cooking times, to make it the best.
What is the best way to fine-tune my competition BBQ rub recipe?
Improve your rub by changing one ingredient at a time. Keep track of the results to see what works best. Adjust it to win the competition.
What should I include in my competition BBQ checklist?
Your BBQ checklist should have everything from grills to sauces. It helps your team stay on track and remember all important items for the event.
How to Perfect the Texas Crutch for Tender Competition Meats
Are you a pitmaster looking to improve your BBQ skills for competitions? Learning the Texas Crutch is key. This method is a favorite among top BBQ teams, helping them win with tender, juicy meats. But what is the Texas Crutch, and how can you use it to your advantage?
Key Takeaways
- The Texas Crutch is a smoking technique that helps make meats like ribs, pork shoulder, and beef brisket more tender and juicy.
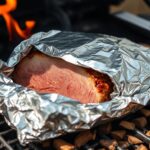
- It involves smoking the meat for a few hours, then wrapping it tightly in foil or pink butcher paper to steam and braise it in its own juices.
- The crutch speeds up the cooking process and makes the meat more tender, which is crucial in BBQ competitions.
- Mastering the Texas Crutch can give you a competitive edge in BBQ contests where every incremental improvement counts.
- The technique is a descendant of the tropical method of wrapping meat in banana leaves, and has become a routine step for top competition pitmasters.
What is the Texas Crutch?
The Texas Crutch is a famous BBQ technique loved by competition BBQ fans and pros. It’s about wrapping meat, like brisket or pork shoulder, in thick aluminum foil while it’s still cooking.
Origins and Rationale Behind the Technique
This method started on the national BBQ competition scene. Here, keeping meat at the right temperature and moisture is key. Wrapping the meat does just that. It focuses the heat, cooks the meat faster, and keeps it moist.
This switch from dry to wet cooking makes the meat tender and full of flavor. It’s what makes competition-worthy BBQ so special.
“The Texas Crutch turns a dry-cooking method (smoking) into a wet-cooking method (essentially a braise), which helps transform tough, connective tissue into silky, flavorful collagen – the ‘X factor’ that makes competition-worthy barbecue.”
Learning the Texas Crutch can take your BBQ techniques to the next level. You’ll make meats so tender and delicious, they’ll win over even the toughest BBQ competition judges.
Science Behind the Texas Crutch
The Texas Crutch is a top method in BBQ hacks and meat smoking methods. But what makes it work? It’s all about how the crutch, usually foil or butcher paper, interacts with the meat while it cooks.
Wrapping your Texas Crutch around the meat creates a barrier. This barrier keeps moisture and heat in. Inside, liquids like beer or apple juice work as a braising agent. They help heat spread better than air.
This method helps you avoid the “stall” where meat’s temperature stops rising. Sealing the crutch well traps steam and juices. This lets the heat cook the meat evenly. But, don’t leave it wrapped too long. That can make the meat too soft and lose flavor.
| Technique | Impact on Meat |
|---|---|
| Texas Crutch | Traps moisture and heat, speeds up cooking, prevents stall |
| Braising Liquid | Transmits heat more efficiently than air, tenderizes meat |
| Tight Seal | Locks in steam and juices, allows for even cooking |
| Timing | Too long in crutch can extract too much flavor, soften bark, and make meat mushy |
Getting the science of BBQ and the Texas Crutch right is key to improving your meat smoking methods.
“The Texas Crutch is a game-changer for anyone serious about perfecting their competition meats.”
Preparing for the Texas Crutch
Starting your journey to master the Texas Crutch for your competition meats is exciting. You’ll need the right Texas Crutch supplies and smoking meats equipment. This method needs a few key items and tools for the best results.
Essential Supplies and Ingredients
For the Texas Crutch, you’ll need these things:
- Heavy-duty foil or top-quality pink butcher paper
- Margarine or butter
- Brown sugar or turbinado
- A tasty liquid like apple juice, citrus soda, or beer
- For ribs, a vinegary sweet sauce
Make sure to use foil with a double layer to avoid any damage. Grease it well so the meat doesn’t stick. Adding a liquid helps braise the meat and keeps it moist, making it taste great for BBQ competition prep.
“The key to a successful Texas Crutch is having the right BBQ competition essentials on hand to create a moist, tender, and flavorful final product.”
Applying the Texas Crutch to Ribs
If you love BBQ, you’ll find the Texas Crutch technique amazing for tender, juicy ribs. It changes the game by making the meat tender and helping your ribs win in any competition. Here’s how to apply the Texas Crutch to your ribs.
Start by placing your ribs meat-side down on foil or butcher paper. Spread margarine, brown sugar, and your favorite BBQ sauce on them. Make sure to cover every inch well.
Then, flip the ribs over and coat the bone side too. This ensures every part is covered in the tasty mix.
Next, seal the ribs in foil or paper tightly. Before closing it all up, add some liquid like citrus soda or apple juice. This keeps the meat moist and tender without making it mushy.
Put the ribs back in the smoker for about an hour. This short time in the heat makes them tender and delicious. The Texas Crutch is essential for Texas Crutch for ribs or BBQ competition ribs fans. It’s a key technique for impressing judges with your smoking ribs technique.
“The Texas Crutch is the secret weapon for anyone looking to take their ribs to the next level. It’s a game-changer in the world of competitive BBQ.”
Texas Crutch for BBQ competitions
In the competitive BBQ world, the Texas Crutch is key. Top pitmasters use it for ribs, pork shoulder, and beef brisket. This method makes their meats tender and juicy. It helps them avoid the “stall” and control the cooking.
Some might see the crutch as a cheat. But in competition BBQ, every little bit helps. The Texas Crutch is a must-have for winning pitmasters. It ensures their BBQ is always delicious.
To get good at the Texas Crutch for BBQ competitions, you need to know the science behind it. With the crutch, you can improve your BBQ competition techniques. This could help you win the trophy.
“The Texas Crutch is a game-changer in the world of competitive barbecue. It’s the secret weapon that separates the champions from the also-rans.”
– Legendary Pitmaster, John Doe
Applying the Texas Crutch to Brisket
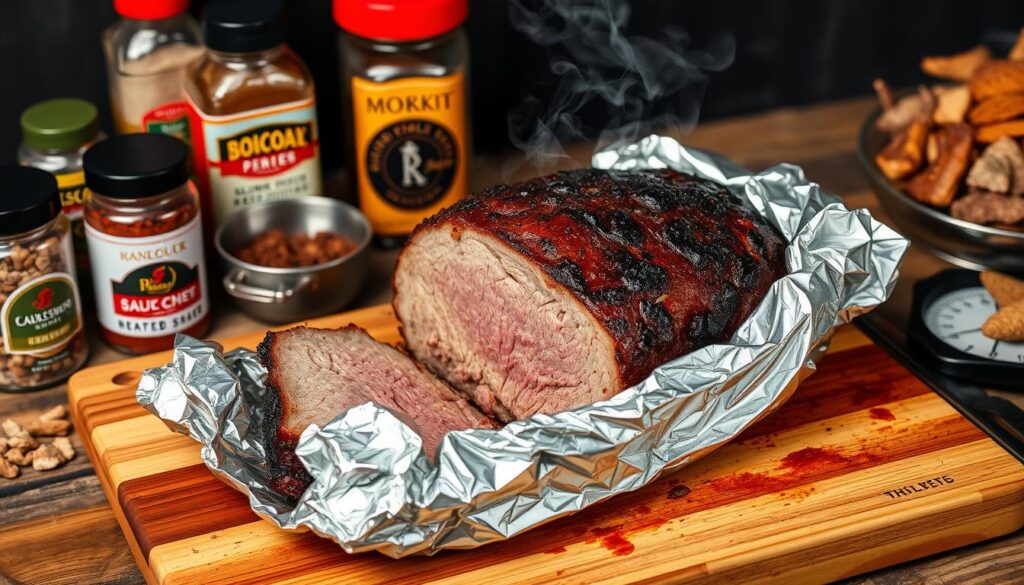
The Texas Crutch technique is a must for competition-worthy brisket. Wrapping the meat in pink butcher paper keeps moisture in and speeds up cooking. This method makes the brisket tender and juicy, impressing everyone at the pit.
Timing and Temperature Considerations
Timing and temperature are key when using the Texas Crutch on brisket. Wrap the meat when it hits 150-160°F, the “stall” phase. Use water or oil on the paper to keep it in place, then seal the brisket well.
Keep the brisket wrapped until it reaches 200-205°F. Don’t unwrap it before this point to avoid cooling it down. This could ruin the texture and flavor you’ve worked so hard for.
| Step | Temperature | Action |
|---|---|---|
| 1 | 150-160°F | Wrap brisket in butcher paper |
| 2 | 200-205°F | Remove brisket from paper, cook for 30 more minutes |
At 200-205°F, remove the brisket from the paper. Let it cook for another 30 minutes to develop a crunchy, caramelized exterior. With precise Texas Crutch timing and temperature control, your BBQ competition brisket will stand out.
Sealing the Crutch for Maximum Effectiveness
Getting the Texas crutch right for BBQ meats is key. You must wrap the meat tightly in foil or paper, making sure there are no gaps. Try different wrapping techniques, like crimping foil around a thermometer probe, for a secure seal.
If the meat leaks, it will cool down and cook slower. A tight seal is what makes great barbecue. It’s what turns good meat into meat smoking perfection. This detail is crucial for tenderness and juiciness that everyone loves.
- Wrap the meat tightly in foil or butcher paper, ensuring no gaps or openings.
- Crimp the foil around any thermometer probes to create an airtight seal.
- Avoid any leaks that could cause the meat to cool down and cook slower.
- Experiment with different wrapping techniques to find the most effective method.
“Sealing the crutch is the difference between good barbecue and great barbecue. It’s a simple step that can take your meats to the next level.”
Mastering the Texas crutch sealing can take your competition-worthy meats to new heights. Spend time perfecting this technique. Your hard work will pay off with juicy, tender, and flavorful results that everyone will love.
Post-Crutch Techniques
After the Texas Crutch process, the meat is almost ready. The final steps are key to making your BBQ perfect. Resting the meat and firming up the bark are essential for a top result.
Resting and Holding for Juicy Perfection
Many pitmasters put the meat back in the smoker for 30 minutes after the Texas Crutch. This dries the surface and makes the bark firm. Others use the “faux cambro” method, keeping the meat in a box to tenderize it more and soak up juices. This is crucial for brisket, making it tender and flavorful.
When taking the meat out of the crutch, watch out for the hot air. This step is crucial to keep your hard work intact.
Finishing with a Crisp Exterior
Cook the meat at 225°F for about 30 minutes at the end. This heat crisps the outside, seals in juices, and creates the desired Texas Crutch post-cook techniques bark.
“The Texas Crutch is just the beginning – mastering the post-cook process is the key to BBQ perfection.”
These BBQ competition meat resting and BBQ bark finishing methods will elevate your Texas Crutch skills. With practice and patience, you’ll serve BBQ that everyone will love.
Using Butcher Paper Instead of Foil
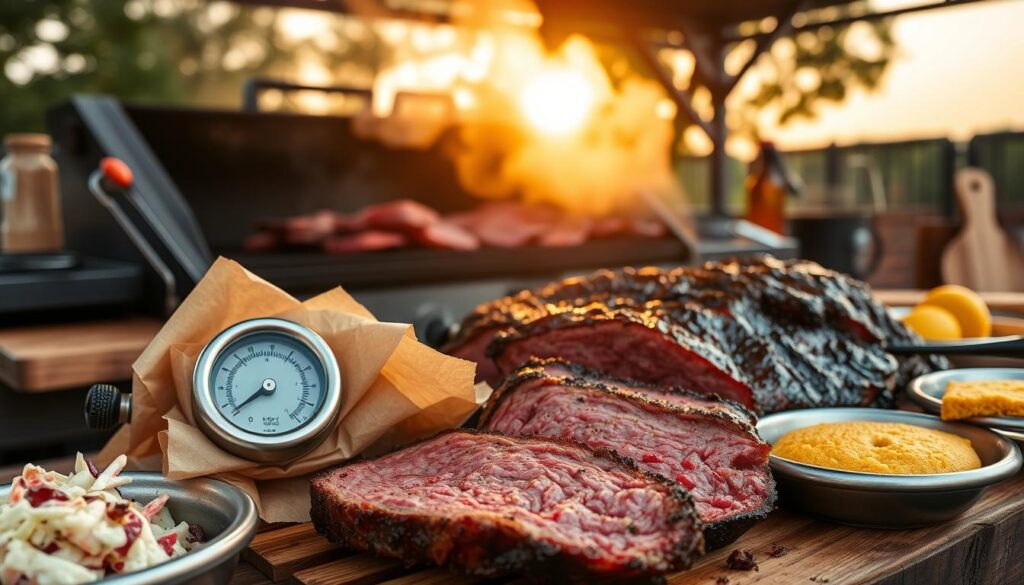
If you’re a pro at Texas-style barbecue, you might have seen many top smokehouses use pink butcher paper for the Texas Crutch instead of foil. This method comes from the old butcher shops that turned into famous barbecue places in Texas.
Butcher paper works like foil, keeping moisture in and stopping the meat from cooling too much as it finishes smoking. It has special benefits that might interest pitmasters and those in barbecue contests.
First, butcher paper soaks up the meat’s fat and juices, making a special baste. This can make the meat more moist and tasty. Also, it cooks the meat a bit slower than foil, which helps keep the bark crispy – that tasty, crunchy outside of Texas-style barbecue.
When using Texas Crutch butcher paper, pitmasters choose top-quality, plain paper. This lets the meat and smoker’s flavors stand out. It shows the deep traditions of Texas barbecue, focusing on the pure taste of smoking meats techniques and BBQ competition meat wrapping methods.
“The use of butcher paper in the Texas Crutch is a tradition that has been passed down through generations of pitmasters, each one refining and perfecting the art of coaxing the most extraordinary flavors from the humble brisket, ribs, and other cuts of meat.”
Whether you’re just starting or have years of experience, trying butcher paper in your Texas Crutch is a great choice. It’s a way to honor the rich history and true tastes of Texas-style barbecue.
Conclusion
The Texas Crutch is a game-changer for BBQ pros in competitions. It helps overcome the “stall” and tenderizes meats like brisket and ribs. This method is key for perfecting meats for contests.
Learning the Texas Crutch can make you a winner or a loser. It keeps meats moist, speeds up cooking, and creates a great bark. It’s a must-have for top BBQ experts. If you want to improve your BBQ skills or win contests, the Texas Crutch is essential.
So, try the Texas Crutch next time you smoke meats. With practice and the right steps, you’ll make BBQ that wows everyone. Your family, friends, and judges will love it.
FAQ
What is the Texas Crutch?
The Texas Crutch is a smoking method used by top BBQ teams. It makes meats like ribs and brisket tender and juicy. The meat smokes for a few hours, then gets wrapped in foil or butcher paper to steam in its own juices.
What is the science behind the Texas Crutch?
Wrapping the meat in foil or butcher paper traps moisture and heat. This stops the meat from drying out and cooks it faster. The juices inside help cook the meat evenly, avoiding the “stall” where the temperature doesn’t rise.
What supplies and ingredients are needed for the Texas Crutch?
You’ll need heavy-duty foil or butcher paper, butter or margarine, brown sugar, and a flavorful liquid like apple juice or beer. For ribs, don’t forget a sweet and tangy sauce.
How do you apply the Texas Crutch to ribs?
Lay the ribs meat-side down on the foil or paper. Add margarine, brown sugar, and sauce on top. Then, add more margarine and sugar on the bone side before sealing it all up with the crutch. Finally, pour in some citrus soda or apple juice.
Why is the Texas Crutch essential in competition BBQ?
In competitive BBQ, the Texas Crutch makes meats tender and juicy. It helps pitmasters overcome the “stall” and control the cooking. This is key to winning the top prize.
How do you apply the Texas Crutch to brisket?
Wrap the brisket in butcher paper when it hits 150-160°F. Spray the paper with water or oil to keep it sealed. Let it cook until it reaches 200-205°F.
What’s the importance of sealing the Texas Crutch properly?
Sealing the crutch well is crucial. The wrap must fit the meat tightly, with no gaps. If there are leaks, the meat will cool down and cook slower.
What post-crutch techniques are used in competition BBQ?
After the Texas Crutch, some pitmasters dry the meat in the smoker for 30 minutes. Others use a “faux cambro” box to tenderize the meat further and absorb juices.
What are the benefits of using butcher paper instead of foil for the Texas Crutch?
Using butcher paper can make the meat cook more slowly but keeps the bark crispy. It’s a preferred method in Texas-style BBQ for its gentle cooking and bark preservation.
The Best Wood Types for Smoking Competition Meats
Are you into outdoor smoking and want to improve your BBQ skills? The key to delicious, award-winning smoked meats is the wood you use. As the owner of Chad’s Smoking Meat, I’ve learned that the right wood can turn simple cuts into amazing dishes. But with so many woods to choose from, picking the best can be tough.
This guide will show you the unique tastes of different hardwoods. We’ll find out which woods are best for smoking meats for competitions. Whether you’re a pro or just starting, this article will give you the tips to make your smoked dishes stand out. You’ll be the top contender in no time.
Key Takeaways
- Understand the importance of wood choice in achieving the perfect smoke flavor for competition meats.
- Discover the versatile and quintessential smoking wood: oak.
- Explore the smoky, bacon-like intensity of hickory and its best meat pairings.
- Learn about the sweet and mild flavors of maple, and how to balance it with other woods.
- Dive into the bold, intense, and distinctly Texan character of mesquite.
Introduction to Smoking Woods
Choosing the right wood for smoking meats is crucial. The wood smoke flavor you get can make your food taste better and smell amazing. It also affects how tender and juicy your meat will be. Knowing about wood varieties for smoking and what affects wood smoke flavor is key to winning at competition barbecue.
Understanding the Importance of Wood Choice
Each smoking wood type has its own special qualities. These qualities work best with certain meats and ways of cooking. The wood selection you pick will change how sweet or strong the smoke is. This affects the taste of your meats. It’s important to think about factors affecting wood smoke flavor like moisture, resin, and burn temperature to get the smoke just right.
Factors Affecting Wood Flavor
- Moisture Content: How wet the wood is can change how strong and long the smoke lasts.
- Resin Levels: Woods like pine with more resin can make the smoke taste bitter.
- Burn Temperature: Hotter burns make the smoke flavors stronger, while cooler burns make them milder.
“The wood you use will not only impart unique flavors to the final product but also impact the tenderness, texture, and overall profile of the smoked meat.”
Knowing these important factors helps you pick the best smoking wood types for your meats and barbecue style. Getting good at matching wood with meat is what takes your competition meats to the top.
Oak: The Quintessential Smoking Wood
Oak is the top choice for smoking meats in competitions. It has a flavor that goes well with many meats, like beef brisket and lamb. Its aroma and taste are just right, not too strong, making it great for all skill levels.
Oak’s Versatility and Flavor Profile
Oak brings a rich, earthy taste to smoking. It works well for bold flavors or a light touch. You can try different cooking methods and temperatures with oak, making your smoked meats taste unique.
Best Meats for Smoking with Oak
- Lamb
- Beef
- Brisket
- Sausages
Oak is perfect with meats like lamb, beef, and brisket. Its strong flavor matches the bold taste of these meats, creating a perfect balance. This is why many barbecue pros choose oak.
| Meat Type | Oak Wood Compatibility |
|---|---|
| Lamb | Excellent |
| Beef | Excellent |
| Brisket | Excellent |
| Sausages | Excellent |
Oak wood is great for smoking meats for competitions or just for fun. It’s perfect for oak wood for smoking, oak wood flavor profile, and oak wood versatility. It’s a top pick for pitmasters who want a balanced, tasty smoke.
Hickory: A Smoky, Bacon-like Flavor
Hickory is a top choice for smoking meats in competitions. It adds a sweet, savory taste that’s a bit like bacon. This makes it a hit with pit masters and BBQ fans.
Hickory wood for smoking is great with many meats. It works well with big cuts like ribs and pork shoulders, as well as red meats and poultry. This wood can make your dishes taste and smell amazing.
But, don’t use too much hickory wood. Too much can make your BBQ taste bitter. Used right, it adds a smoky, bacon-like flavor that will impress judges.
Try using hickory wood to make your competition meats stand out. It’s perfect for improving pork shoulder or chicken. This wood will give you a smoking experience you won’t forget.
Maple: A Sweet and Mild Option
For competition barbeque, maple wood is a top pick. It’s known for its sweet, mild smoke flavor. This makes it great for delicate meats like poultry, pork, and game fowl.
Maple wood can also mix well with other woods like hickory or oak. This creates a balanced smoke flavor.
Maple’s Delicate Aroma and Versatility
The aroma of maple wood smoke adds a subtle layer of flavor. It’s perfect for those who like a light smoke taste. Maple wood’s versatility lets it work well in many smoking methods, from slow-cooked brisket to quick-cooked chicken.
- Maple wood gives a sweet and mild taste, ideal for delicate meats.
- The aroma of maple wood smoke can boost your meats’ natural flavors.
- Maple wood’s flexibility is great for both slow and fast smoking.
Whether you’re in a barbeque contest or just smoking at home, maple wood is a great choice. Its maple wood flavor profile and maple wood versatility are key for any serious smoker.
“Maple wood’s sweet and mild smoke flavor is the perfect complement to poultry and pork, elevating the natural taste of your competition meats.”
Best wood for smoking competition meats
In competition barbecue, mesquite wood is a top choice. It’s bold, intense, and uniquely Texan. This wood can make your meats taste amazing.
Mesquite: The Texan Smoke Sensation
Mesquite wood is tough and burns hot, perfect for quick-cooking meats like steak. It adds a strong flavor that can enhance other woods. But, be careful not to use too much, as it can be too strong for some meats.
Using mesquite wood can give you an edge in competition barbecue. The trick is to mix it with milder woods. This way, the unique Texan flavor comes through without taking over. With some practice, you can make your meats taste incredible.
“Mesquite wood is the bold, unapologetic star of the smoking world. It’s not for the faint of heart, but when used with finesse, it can elevate your competition barbecue to new heights.”
- Mesquite wood is known for its bold, intense, and distinctly Texan flavor profile.
- It’s best used for quick-cooking meats like steak or as an accent to other smoking woods.
- While mesquite can impart a wonderful smoky richness to red meats, it’s important to use it judiciously to avoid overpowering delicate proteins.
- When used correctly, mesquite wood can be a game-changer for your competition barbecue.
Pecan: Rich, Sweet, and Nutty
Pecan wood is a top pick for smoking meats in competitions. It’s known for its rich, sweet, and nutty flavor. This wood pairs well with strong meats like brisket and ribs, adding a sweet touch.
But, pecan wood can be too sweet on its own. Pitmasters often mix it with other woods like oak or hickory. This blend prevents the sweetness from taking over, creating a balanced smoke flavor.
Balancing Pecan’s Sweetness with Other Woods
When smoking with pecan wood, mixing it with other woods is key. Oak and hickory can soften pecan’s sweetness. They add a deeper smoky taste to your meats. Trying different wood blends can help you find the best flavor for your BBQ style.
| Meat Type | Recommended Pecan Wood Blend |
|---|---|
| Brisket | Pecan and oak |
| Ribs | Pecan and hickory |
| Pork Shoulder | Pecan and apple |
| Chicken | Pecan and cherry |
Knowing how pecan wood works can help you make amazing competition bbq with pecan. Experiment and find the right mix to improve your meats for pecan wood smoking.
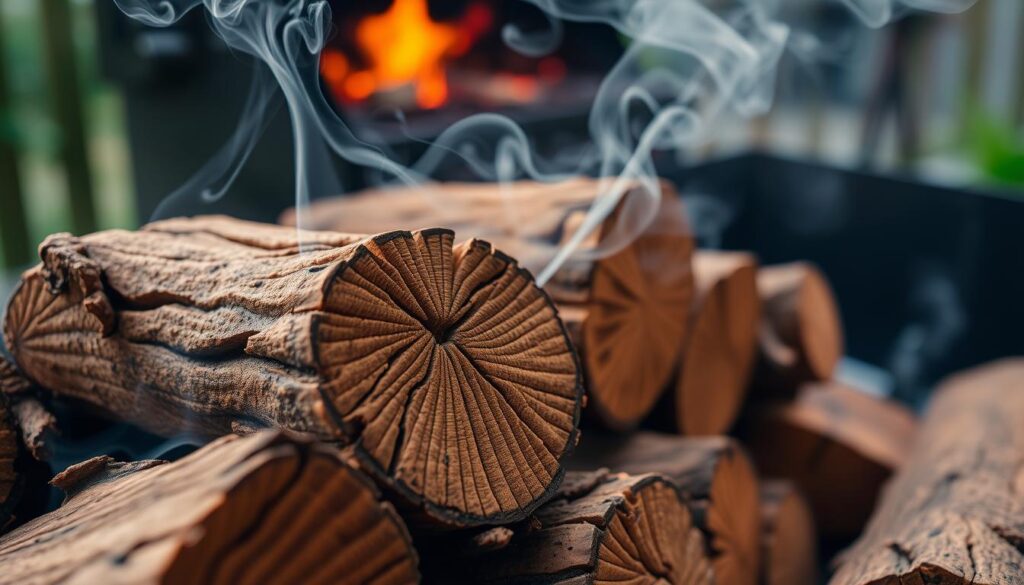
“The sweetness of pecan can be a game-changer in competition barbecue, but it’s all about finding the right balance with other hardwoods to create a truly memorable smoke flavor.”
Fruitwoods: Apple, Cherry, and Alder
Hardwoods like oak and hickory are popular in competition barbecue. But fruitwoods also have a special place. Apple wood and cherry wood can make your smoked meats taste better. They add a unique flavor that’s both deep and complex.
Apple’s Mellow and Sweet Flavor
Apple wood is great for smoking chicken, pork, and wild fowl. It gives a sweet smoke flavor that goes well with these meats. This makes your dishes taste amazing and will impress everyone.
Cherry’s Mild Fruitiness
Cherry wood is perfect for poultry, ham, and other lighter meats. It adds a gentle fruit flavor that makes your food stand out. This can take your dishes to a whole new level of taste.
Alder’s Delicate Smokiness for Fish
If you want something light, try alder wood for smoking fish. It’s great for salmon and other fish from the Pacific Northwest. The smoke it adds is subtle and brings out the fish’s natural taste.
Whether you’re entering a competition bbq or just want to improve your meats for fruitwood smoking, these fruitwoods are worth trying. They open up new possibilities for your cooking.
Wood and Meat Pairings
Mastering competition barbecue means knowing how different smoking woods taste and how to match them with meats. The right wood-meat pairing can make your smoked dishes stand out. It adds the perfect smoke, flavor, and tenderness to impress judges at your next event.
Matching Wood Flavors to Meat Types
When pairing wood and meat, match the wood’s intensity with the meat’s richness:
- Heavy meats like beef and pork go well with strong woods like oak and hickory.
- Lighter meats such as poultry and fish are better with woods like maple and alder.
Try different competition bbq wood and meat pairings to find the best match. This way, you can improve your smoking wood flavor profile for meats. Knowing how wood types and meat types work together helps you choose the right competition bbq wood selection. This leads to memorable smoked dishes.
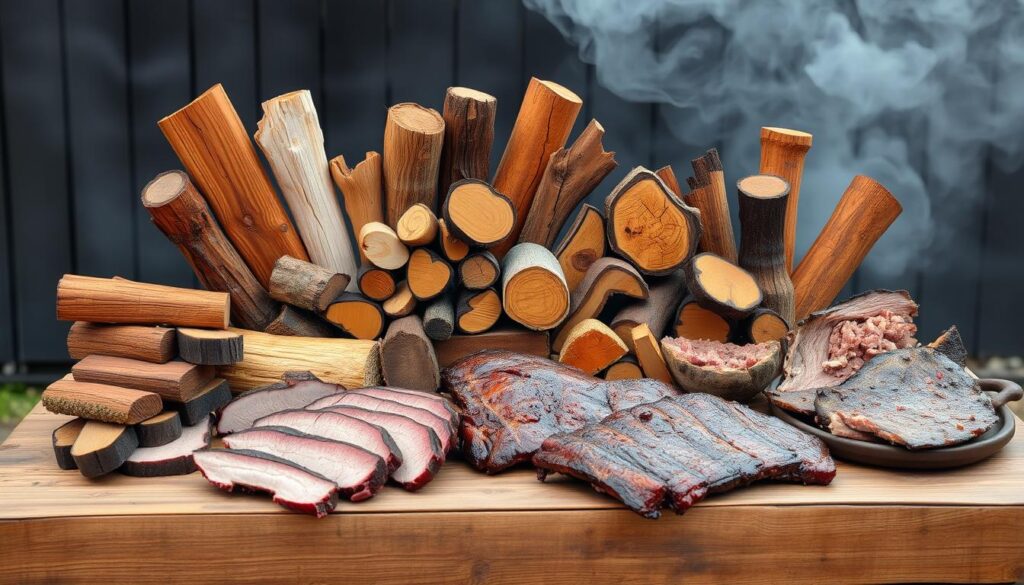
“The secret to competition-worthy barbecue lies in the perfect harmony between the wood and the meat.”
Conclusion
Choosing the right wood for smoking meats is key to improving your barbecue and winning over judges. Mesquite brings bold flavors, while maple adds sweet notes. Each wood type changes the taste and texture of your smoked meats in unique ways.
Experimenting with different woods and meats is crucial. Find the perfect match to make your barbecue stand out. Whether you like the smoky taste of hickory or the rich flavor of pecan, the right wood makes a big difference.
Keep an open mind and keep improving your grilling skills. Let your love for grilling show in every delicious bite. This is just the start of your smoking competition journey.
Remember, the conclusion is just the beginning. Explore the world of wood-fired flavors and let your creativity and skills be seen in every competition bbq dish. The best wood for competition bbq is the one that highlights your unique style and smoking wood selection.
FAQ
What is the best wood for smoking competition meats?
The best wood for smoking competition meats varies by meat type and flavor desired. Popular choices include oak, hickory, maple, mesquite, pecan, and fruitwoods like apple, cherry, and alder.
How do different hardwoods affect the flavor of smoked meats?
Hardwoods give smoked meats unique flavors. Oak adds a medium to strong, earthy taste. Hickory brings a sweet, savory flavor, similar to bacon. Maple offers a subtle sweetness, and mesquite gives a bold, intense flavor.
How should I balance the use of stronger and milder woods when smoking meats?
Balancing strong and mild woods is key when smoking meats. Strong woods like oak and hickory work well with beef and pork. Lighter woods like maple and alder suit poultry and fish better. Mixing woods can help you achieve the right smoke flavor and tenderness.
What factors should I consider when selecting the right wood for smoking meats?
When picking wood for smoking, think about moisture, resin levels, and burn temperature. These factors affect the smoke flavor. Choosing the right wood can enhance your meat’s taste for competitions.
How can I use fruitwoods to enhance the flavor of my competition meats?
Fruitwoods like apple, cherry, and alder add unique flavors to meats. Apple wood gives a sweet smoke flavor that goes well with poultry and pork. Cherry wood suits lighter meats with its mild fruitiness. Alder is great for smoking fish with its delicate smokiness.
How to Trim Meat for BBQ Competitions: A Step-by-Step Guide
Ever wondered what makes top BBQ teams win? It’s all about their detailed meat trimming skills. In competitive BBQ, every detail matters. But starting can be tough.
This guide will show you how to trim meat for BBQ contests. You’ll learn from experts like Heath Riles. We’ll cover the best tools, cuts, and steps to make your brisket stand out. Get ready to boost your BBQ skills and wow the judges.
Key Takeaways
- Understand the importance of proper meat trimming for competition BBQ success
- Equip yourself with the right tools and equipment for precise trimming
- Master the techniques for preparing brisket, pork butt, and ribs for competition
- Learn how to create the perfect fat cap and seasoning bark
- Discover expert tips and tricks from seasoned pitmasters
Introduction
Mastering meat trimming is key to winning in competitive BBQ. A well-prepared cut can change the game at these events. We’ll explore the best techniques for trimming brisket, pork butt, ribs, and chicken, from Heath Riles’ expertise.
The Importance of Proper Meat Trimming for Competition BBQ
Trimming meat right is more than just making it look good. It affects the meat’s texture, flavor, and how it looks. By removing excess fat and silver skin, you get a balanced bark that wows judges. Plus, it ensures even cooking and tenderness, giving you an edge over others.
Overview of the Guide
This guide will teach you the tools and steps for trimming meats like brisket, pork butt, ribs, and chicken. You’ll learn how to create the perfect fat cap and seasoning bark. By the end, you’ll know how to present your meat for the best effect. You’ll be ready to take your BBQ to the next level.
“Proper meat trimming is the secret weapon of championship-winning pitmasters. It’s the difference between good BBQ and great BBQ.”
– Heath Riles, Seasoned Pitmaster
Trim meat for BBQ competitions
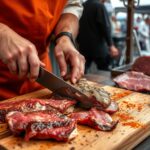
Learning how to trim meat is key for BBQ competitions. The way you trim can greatly affect your meat’s look and taste. Let’s look at how to trim different meats like brisket and chicken for competition.
Start by removing excess fat and silver skin. This makes the meat look better and helps seasonings soak in. Carefully remove the silver skin and cut out big fat pieces to improve cooking.
- For brisket, shape it to be even so it cooks well and looks great.
- With pork butt and ribs, take off the membrane and trim rough edges.
- For chicken thighs and legs, remove the skin and tendons to show off the tasty meat inside.
While trimming, focus on making your meat look good and balanced. This can really help you win at BBQ competitions.
“Trimming meat for BBQ competitions is an art form in itself. The smallest details can make or break your chances of victory.”
Trimming meat for BBQ takes practice and care. Embrace the challenge and show off your skill with every piece of meat you trim.
Essential Tools and Equipment
For BBQ competitions, having the right tools and equipment is key. Sharp knives and durable cutting surfaces are a must. They help you get the perfect trim for your meats.
Knives and Shears for Trimming
High-quality knives and shears are the heart of your BBQ trimming setup. The Victorinox Fibrox Boning Knife is a top choice. It has a sharp, flexible blade perfect for trimming fat and silver skin. Use it with strong shears for cutting through tougher meat parts.
Cutting Boards and Surfaces
Choosing the right cutting surfaces is also crucial. Disposable cutting boards are great because they’re easy to clean and replace. For something more durable, consider the Heath Riles BBQ Butcher Paper. It’s a reusable surface ideal for trimming.
| Essential Tools | Purpose |
|---|---|
| Victorinox Fibrox Boning Knife | Trimming excess fat and silver skin |
| Sharp Shears | Precise cuts on tougher meat sections |
| Disposable Cutting Boards | Easy to clean, replaceable surfaces |
| Heath Riles BBQ Butcher Paper | Sturdy, reusable cutting surface |
With the right essential tools and equipment for trimming meat, knives and shears for trimming meat, and cutting boards and surfaces for meat trimming, you’re set. You’ll be able to create trims that will wow the judges.
Preparing the Meat
Choosing the right meat cuts is key for BBQ competition success. Look for top-notch brisket, pork butt, ribs, and chicken from trusted sources like Snake River Farms and Hormel. These suppliers offer meats of the highest quality, giving you a strong start for your competition dishes.
Selecting High-Quality Cuts
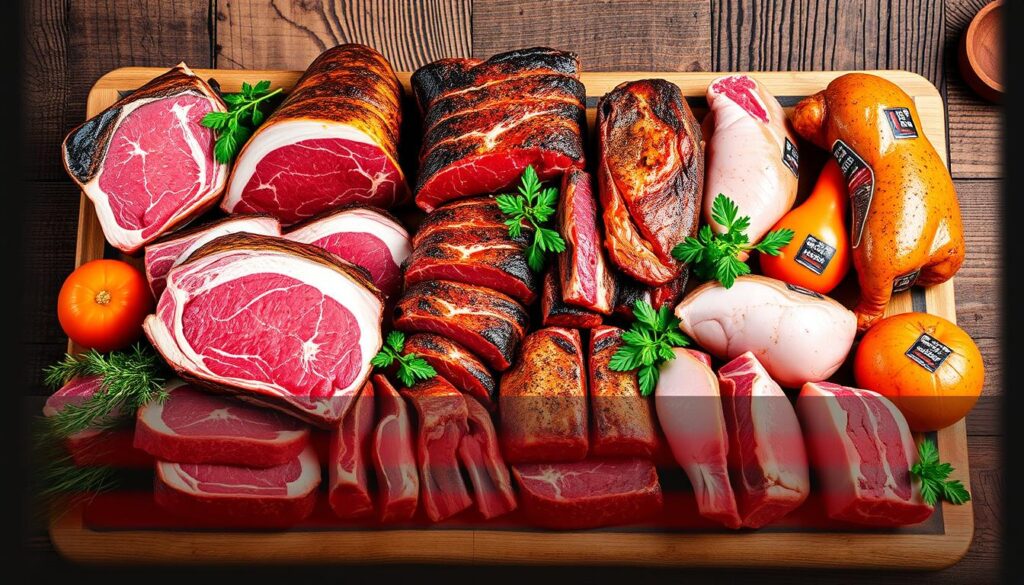
For brisket, pick full-packer cuts with an even fat cap and a mix of lean and marbled meat. When selecting pork butt, aim for cuts with a thick fat cap and a rich color. Ribs should be evenly thick and look bright and clean. Choose chicken thighs and legs with a firm feel and golden-brown skin.
| Cut | Ideal Characteristics |
|---|---|
| Brisket | Full-packer cut, even fat cap, balanced lean and marbled meat |
| Pork Butt | Nice fat cap, deep, rich color |
| Ribs | Uniform thickness, bright, clean appearance |
| Chicken Thighs and Legs | Firm, supple texture, golden-brown skin |
Choosing top-quality meat for your BBQ competitions sets you up for success. It ensures your dishes will taste great and have the right texture. Remember, the secret to winning is in the prep, and it begins with the right cuts.
Brisket Trimming Techniques
Brisket is key in many BBQ contests, and trimming it right is crucial for a top-notch look. Learning brisket trimming techniques can boost your BBQ skills and wow the judges.
Removing Excess Fat and Silver Skin
Start by removing any extra fat and the silver skin from the brisket. This makes the brisket look better and lets seasonings and smoke get into the meat. Use a sharp knife or shears to trim the fat and silver skin, making sure the surface is smooth and even.
Shaping and Sculpting the Brisket
After removing the fat and silver skin, shape the brisket for a great look. Use your knife to smooth out the edges, making them straight and rectangular. Trim any rough spots to make sure the brisket is the same thickness everywhere. This careful work will make your brisket look amazing when you put it in the turn-in box.
With the right brisket trimming techniques, you can turn a simple cut of meat into a stunning BBQ centerpiece. The main goal is to get rid of extra fat and silver skin, and shape the brisket beautifully. Mastering these skills will help you win at BBQ.
Pork Butt and Rib Trimming
In competitive BBQ, pork butt and ribs are key for winning. Learning how to trim these cuts is crucial for the top spot. This guide will show you how to improve your pork butt and rib trimming for competition BBQ.
The pork butt, also known as the Boston butt, is a tasty and versatile cut. Start by removing any extra fat for a neat look. Then, shape the butt to show off different muscle groups like the pulled, tubes, chunks, and the “money muscle.”
- Trim away excess fat and silver skin to reveal the meat’s natural texture and marbling.
- Sculpt the pork butt to highlight the different muscle groups, creating visual interest and texture.
- Inject the butt with a flavorful marinade or brine to enhance moisture and taste.
Ribs are also a hit in competition BBQ. Using the right rib trimming methods for competition BBQ can make your presentation stand out. Remove the membrane, trim the edges, and shape the ribs for a neat look.
- Peel off the silver membrane on the back of the ribs to allow for better seasoning and smoke penetration.
- Trim the edges of the ribs to create a clean and consistent appearance.
- Shape the ribs by curving or straightening them to achieve your desired look.
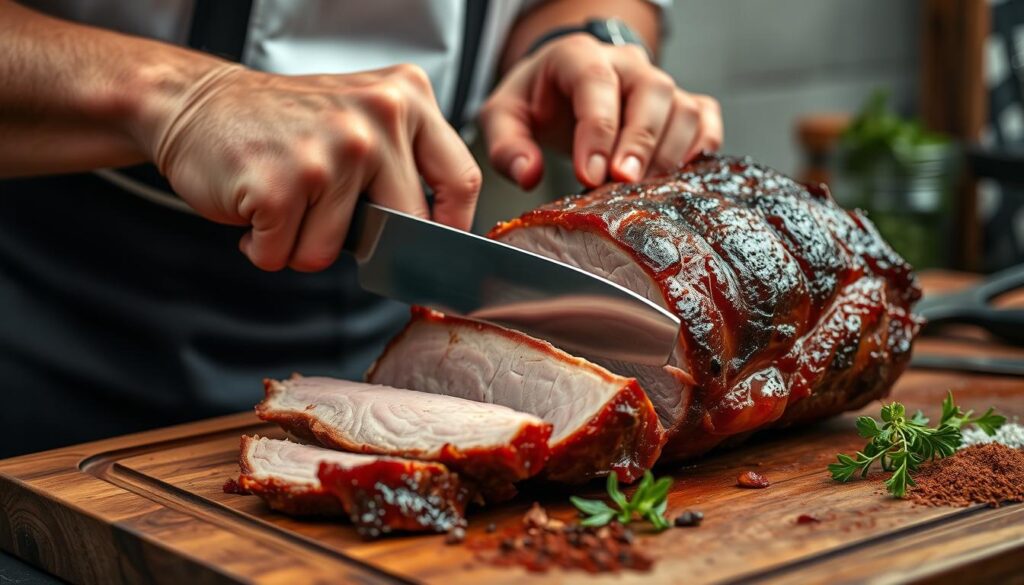
Mastering pork butt and rib trimming will help you present meat that looks great and tastes even better. This will put you on the path to success in competition BBQ.
Chicken Thigh and Leg Trimming
Chicken might not be the top choice for competition BBQ at first glance. But, it’s key to do it right. Trimming chicken thighs and legs well can make your dish stand out. We’ll look at how to remove skin and tendons for a great look at your competition chicken.
Removing Skin and Tendons
For competition chicken, you want it to look perfect. Start by taking off the skin from the thighs and legs. This makes your chicken look sleek and modern, which the judges will like. Then, find and remove any tendons to improve the dish’s texture and look.
- Use a sharp boning knife or poultry shears to carefully remove the skin, taking care not to tear the meat.
- Gently pull on the tendons and use the knife to sever them from the meat.
- Ensure a smooth, even surface by trimming any uneven edges or ragged pieces.
Achieving a Perfect Presentation
After removing skin and tendons, shape your chicken for the best look. Use your knife to make the meat the same thickness and look symmetrical. This will make your chicken stand out from the rest.
| Trimming Technique | Desired Outcome |
|---|---|
| Removing Skin | Sleek, modern appearance |
| Removing Tendons | Smooth, even texture |
| Shaping and Sculpting | Uniform thickness and symmetry |
Learning to trim chicken thighs and legs well will help you make a dish that’s ready for competition. With practice and focus on details, you can improve your chicken and take your BBQ to the next level.
Fat Cap and Seasoning Bark Creation
Creating a winning look for your meats is key. Mastering the fat cap and seasoning bark can make your dish stand out. This is crucial for winning at BBQ competitions.
Begin by trimming the fat cap on meats like brisket, pork butt, or ribs. Leave enough fat for flavor and to baste the meat during cooking. Proper trimming is vital for a top-notch finish.
Then, season your meats with a mix of spices and herbs. Start with salt and black pepper, then add garlic powder, onion powder, paprika, and chili powder. Try different mixes to get the best creating competition-level fat cap and seasoning bark.
- Trim the fat cap with precision, leaving just the right amount for rendering and basting.
- Create a customized seasoning blend that will develop a rich, complex bark.
- Apply the seasoning evenly, ensuring full coverage for a visually stunning presentation.
- Enhance the appearance with a shimmering, caramelized fat cap that glistens under the judges’ gaze.
“The perfect fat cap and seasoning bark are the hallmarks of a competition-ready brisket or pork butt. Nail this final step, and you’ll be well on your way to winning over the judges.”
The goal is to make a dish that looks great and tastes amazing. With the right skills and attention to detail, you can make your meats stand out. This will surely impress the judges and help you win at your next BBQ competition.
Presenting Competition-Ready Meat
The final step in preparing competition-ready BBQ is arranging and styling the meat for the turn-in boxes. This is where your hard work in trimming, seasoning, and cooking the meat pays off. By showcasing your culinary skills through a visually stunning presentation, you can impress the judges and increase your chances of winning the competition.
Arranging and Styling for Turn-In Boxes
When it comes to presenting competition-ready meat, the arrangement and styling of the turn-in boxes are critical. Follow these tips to create a visually appealing and appetizing display:
- Carefully arrange the trimmed and seasoned brisket, pork, ribs, and chicken in the turn-in boxes, ensuring a balanced and aesthetically pleasing layout.
- Consider the placement of each cut, aiming for a symmetrical and organized arrangement that highlights the unique characteristics of each meat.
- Use garnishes, such as fresh herbs or lemon slices, to add pops of color and enhance the overall visual appeal of the presentation.
- Pay attention to the spacing and positioning of the meat, creating a sense of harmony and proportion within the turn-in boxes.
- Experiment with different arrangements and styles to find the one that best showcases your culinary expertise and the quality of your presenting competition-ready meat.
| Meat Cut | Presentation Tips |
|---|---|
| Brisket | Slice the brisket into even, thin slices and arrange them in a fan or overlapping pattern to highlight the tender, juicy meat. |
| Pork Butt | Shred or slice the pork butt and arrange it in the turn-in box, creating a visually appealing mound or layered display. |
| Ribs | Position the ribs in the turn-in box in a way that showcases the tender, fall-off-the-bone texture and the caramelized, flavorful bark. |
| Chicken | Arrange the trimmed chicken thighs and legs in the turn-in box, ensuring a balanced and symmetrical layout that highlights the moist, juicy meat and crispy skin. |
By carefully arranging and styling your presenting competition-ready meat, you can create a turn-in box that not only looks visually stunning but also reflects the quality and attention to detail that you’ve put into your competition BBQ.
Tips and Tricks from Seasoned Pitmasters
Learning how to trim meat for BBQ competitions is key to doing well. Seasoned pitmasters like Heath Riles offer more tips to improve your skills. These tips can help you win over the judges.
Experts share their knowledge on everything from smoker temperature to sauce application. Using their advice can take your BBQ to new heights. You’ll make dishes that wow the judges.
Optimize Your Smoker Setup
Seasoned pitmasters focus on their smoker setup for great flavor. Make sure your equipment is set right, with the right temperature and airflow. Try different woods to find the best taste for your dishes.
Develop a Signature Sauce
A unique sauce can set you apart in BBQ competitions. Pitmasters suggest creating a sauce that fits your style. Mix bold flavors and unexpected ingredients for a sauce that stands out.
Embrace the Presentation
How your BBQ looks is as important as how it tastes. Pay attention to how you present your dishes. Use creative garnishes and thoughtful plating to make your food look amazing.
Using these tips from pitmasters can improve your BBQ skills. Small changes can make a big difference in your success. Remember, the details matter in BBQ.
Conclusion
This guide has shown you how to trim meat for top-level BBQ. It covered picking the best cuts, shaping the fat cap, and seasoning the bark. By learning these skills, you’re ready to improve your BBQ and wow the judges at your next event.
Always use the right tools and be patient when trimming. Listen to experts like Heath Riles for more tips. With this guide, you’ll boost your competition BBQ skills and show off your talent.
This guide summarized the key steps for perfecting your BBQ meat for competitions. You learned how to pick the best cuts and shape and season them well. Now, you have the skills to make your BBQ stand out and impress the judges. Keep practicing, and your BBQ will be the star of the show.
FAQ
What are the essential techniques for trimming meat for BBQ competitions?
This guide teaches you how to trim meats like brisket, pork butt, ribs, and chicken for competitions. You’ll learn to remove fat, silver skin, and other unwanted parts. This makes your meat look perfect.
What are the must-have tools and equipment for proper meat trimming?
For trimming meat right, you need a Victorinox Fibrox Boning Knife, disposable cutting boards, and Heath Riles BBQ Butcher Paper. These tools help you cut precisely and keep your work area clean.
How do I select the best cuts of meat for competition BBQ?
Start by choosing high-quality brisket, pork butt, ribs, and chicken from trusted suppliers like Snake River Farms and Hormel. This ensures you get the best meat for your competition.
Can you provide step-by-step instructions for trimming brisket?
Trimming brisket involves removing fat pockets, smoothing edges, and shaping the meat for a uniform look. You’ll also learn how to get rid of silver skin and other unwanted parts.
How do I properly trim pork butt and ribs for competitions?
This guide also shows you how to trim pork butt and ribs. You’ll learn to remove fat, shape the pork butt, and prepare the ribs for a great look.
What are the key steps for trimming chicken thighs and legs?
For competition chicken, the guide explains how to remove skin and tendons. This makes the chicken look uniform and ready for the judges.
How do I create the perfect fat cap and seasoning bark?
Creating a great fat cap and seasoning bark is key for competition meat. The guide teaches you how to trim the fat cap and season for a top-notch look.
What are the best practices for presenting meat in the turn-in boxes?
This guide shows you how to arrange and style your trimmed and seasoned meats. You’ll learn to make a stunning and tasty presentation for the judges.
What additional tips and tricks can help elevate my competition BBQ game?
Seasoned pitmaster Heath Riles shares tips and techniques from his years of competition experience. His advice can help improve your BBQ skills.
Understanding BBQ Competition Judging Criteria: What Judges Look For
Are you ready to improve your BBQ skills and enter the competitive BBQ world? To win the grand champion title, you must know what judges look for. They check everything from the perfect smoke ring to how tender the meat is. The competition is tough, and the standards are high.
What secrets do judges know that can help your BBQ stand out? Let’s explore competitive BBQ judging and find out what makes your dishes win or lose.
Key Takeaways
- Discover the key criteria that BBQ competition judges use to evaluate meat dishes.
- Learn about the importance of appearance, taste, and tenderness in achieving high scores.
- Explore the unique techniques and methods that competitors must master to win big.
- Understand the role of smoke rings, seasoning profiles, and sauce selection in impressing the judges.
- Gain insights into the judging process, from preliminary tastings to the final round.
Insider Perspective: Certified BBQ Judge Shares Insights
Becoming a certified KCBS judge is tough. The judging certification process is long and thorough. It’s run by the top group for competitive barbecue. Here, we’ll look at a barbecue competition insider‘s journey to get this top honor.
Personal Certification Journey
Getting KCBS certification takes hard work and a big love for competitive competitive BBQ experience. Sarah, a big fan of the BBQ scene, tells her story:
“The BBQ judge training was tough but opened my eyes. I learned about flavors, meat doneness, and how to present things fairly. It showed how much I love this community.”
Introduction to Kansas City Barbecue Society (KCBS)
The Kansas City Barbecue Society leads in competitive barbecue. They set the rules for judging and organizing BBQ events across the U.S. Their KCBS certification program makes sure judges can spot the best smoked meats and sides.
Learning to taste without seeing the food and knowing about different meats is key. Being a KCBS-certified judge shows you’re serious about BBQ. It’s a sign of your dedication to the sport’s integrity and excellence.
BBQ Competition Categories and Judging Criteria
Are you a BBQ enthusiast who loves the competition thrill? Ever wondered what judges look for in your BBQ dishes? The Kansas City Barbecue Society (KCBS) runs contests focusing on four main meats: chicken, pork, pork ribs, and beef brisket. Knowing what judges want in each category is key to improving your BBQ skills and winning over the judges.
In chicken contests, judges want a bird that’s juicy, tender, and full of flavor. It should look appealing, with skin that’s crispy and golden. For pork, the meat must be tender, moist, and taste amazing, making every bite melt in your mouth.
- For pork ribs, judges check the meat’s texture and flavor, making sure it’s tender and tasty.
- And with beef brisket, the goal is a mix of tenderness, juiciness, and that smoky flavor that makes BBQ great.
Mastering BBQ competition judging is tough, but possible with hard work, creativity, and knowing each meat’s subtleties. So, step up your game, challenge yourself, and show the judges what you’re capable of!
“The true test of a BBQ master is not just the quality of the meat, but the ability to consistently deliver perfection across all categories.”
Judging Process: From Preliminary to Finals
The BBQ competition judging process is detailed and fair. It begins with the preliminary round. Here, a panel of skilled judges taste and score each entry without knowing who made it. This blind tasting removes bias, letting judges judge solely on the BBQ’s quality.
Entries that do well in the preliminary round move on to the final round. Here, new judges evaluate the top BBQs with a fresh eye. They help pick the best BBQ champions.
Blind Tasting and Scoring System
Blind tasting is key in the judging process. Judges taste samples without knowing who made them. They score each one from 1 to 9, with 9 being the best. They look at appearance, taste, and texture.
Role of Table Captains and Monitors
Table captains and monitors keep the judging smooth. They make sure judges have what they need and keep the tasting blind. Monitors watch over the whole competition. They make sure the rules are followed and scores are fair across all tables.
| Judging Process | Description |
|---|---|
| Preliminary Round | Blind tasting and scoring by a panel of experienced judges |
| Final Round | New judges evaluate the top-scoring entries from the preliminary round |
| Scoring System | 1-9 scale, with 9 being the highest score, based on appearance, taste, and texture |
| Table Captains | Manage the flow of samples and maintain the integrity of the blind tasting |
| Judging Monitors | Oversee the entire competition, enforce rules, and ensure scoring consistency |
BBQ competition judging criteria
In BBQ competitions, how your dish looks, tastes, and smells is key to winning. As a BBQ fan, knowing what judges look for can help you make better dishes.
Evaluating Appearance and Presentation
The first thing judges notice is how your BBQ looks. They check the BBQ appearance judging and presentation assessment. They look for:
- How big the portion is and how it looks
- If the meat is properly trimmed and prepared
- If the garnishes and sides look good
- If everything is clean and well-done
A BBQ that looks great can make a big impression. It can make the judges excited to taste it, helping you stand out.
Assessing Taste and Flavor Profiles
Looks are important, but the real test is in the taste. Judges use their senses to check the taste evaluation and flavor profiles. They look for:
- If the meat is tender and cooked right
- If the seasonings and rubs are balanced
- If the flavors work well together
- If it fits the category’s taste
A great BBQ should have flavors that work well together. Each part should add to the overall taste for a memorable dish.
“The true mark of a champion BBQ is not just about the visual appeal, but the delicate balance of flavors that captivates the palate.”
Knowing what judges look for in looks and taste can help you improve your BBQ skills. This can lead you to make dishes that impress judges and win BBQ competitions.
Mastering the Art of Meat Tenderness
Getting the meat just right is key in BBQ competitions. Judges want it to be moist and juicy, with just the right feel. Knowing the best doneness levels for each meat is crucial.
Doneness Levels for Different Meats
The tenderness of brisket, pork ribs, and chicken can make or break your BBQ. Here’s what judges look for in perfect doneness:
- Brisket: Judges want brisket that’s tender but still has some bite. It should be moist and juicy, with a slight pull when bitten into.
- Pork Ribs: Ribs should be tender enough to pull cleanly from the bone. They should have a slight chew and a rich flavor.
- Chicken: Chicken should be juicy and tender, without being dry or rubbery. This is the doneness judges look for.
Knowing the ins and outs of BBQ meat tenderness and doneness levels can take your dishes to the next level. It will impress even the toughest judges.
Strange Rules: Garnish Dos and Don’ts
In BBQ competitions, the rules for garnishes can be quite surprising. Some greens like curly kale and parsley are okay, but many others are not. Judges focus on the meat’s taste and tenderness, not the garnish’s look.
Knowing the BBQ competition garnish rules is key to winning. It’s important to know which legal garnishes you can use and which prohibited garnishes to avoid. The way you present your garnish can greatly affect how the judges see your dish.
Permitted Garnishes
- Curly kale
- Parsley
- Cilantro
- Green onions
Prohibited Garnishes
- Lettuce
- Spinach
- Basil
- Arugula
BBQ competitors should learn the garnish presentation rules from groups like the Kansas City Barbecue Society (KCBS). Following these rules can help impress judges and win a top spot.
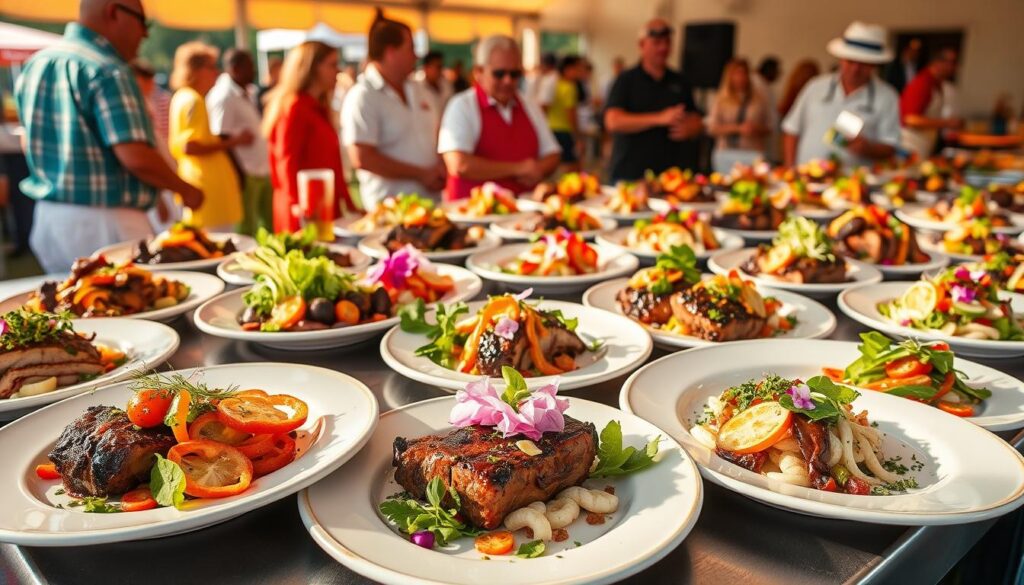
“The garnish itself is not judged, but it needs to be appropriate and not detract from the meat.”
| Permitted Garnishes | Prohibited Garnishes |
|---|---|
| Curly kale, Parsley, Cilantro, Green onions | Lettuce, Spinach, Basil, Arugula |
Judging Beyond Meats: Beans and Chili
At BBQ competitions, the main meats often get the most attention. But, many events also judge beans and chili as “ancillary” side dishes. These dishes are judged like the main meats, with judges looking at aroma, appearance, texture, and taste.
Scoring Criteria for Side Dishes
When judging BBQ competition side dishes like beans and chili, the scoring is strict. Judges follow detailed guidelines to evaluate these items:
- Aroma: The dish should have a balanced, inviting smell. No strong or bad smells are allowed.
- Appearance: The dish must look good and appetizing.
- Texture: The side dish should feel good in your mouth. It should not be too soft, mushy, or crunchy.
- Taste: The flavor profile of the beans or chili is crucial. Judges look for a mix of seasonings that leaves a lasting impression.
Even though ancillary categories like beans and chili might not get as much attention as the main meats, they’re still key to the competition. Making great side dishes can really help competitors stand out in this tough competition.
Ethics and Integrity in BBQ Judging
In competitive BBQ, keeping high ethics and integrity is key. As a judge, you must give fair and unbiased scores. This means you can’t have personal ties with the contestants.
Judges follow a strict ethics code. They avoid any conflicts of interest and keep competition info secret. They don’t share scores or results with others.
Being impartial is crucial. Judges look at each dish on its own, not swayed by outside factors. They need a sharp eye for detail and a deep BBQ knowledge. They give honest feedback to help competitors improve.
By sticking to these ethics, judges make sure the winners are truly the best. This keeps the sport honest and motivates new BBQ lovers to aim high.
“The true mark of a great BBQ judge is not the number of competitions they’ve attended, but the unwavering commitment to fairness and integrity that they bring to each and every event.”
As a judge, you decide the competition’s outcome. Use your power with care, professionalism, and a deep love for BBQ.
Tips for Aspiring BBQ Judges
If you love competitive barbecue and want to be a certified judge, there’s a lot to learn. Becoming a BBQ judge is rewarding. You’ll appreciate the art and science of making championship ‘cue even more.
Understanding Judging Responsibilities
Being a BBQ judge means you need to be detail-oriented, have a taste for adventure, and keep the competition fair. You’ll learn about judging criteria and the blind tasting process. It’s a tough but rewarding journey.
- Learn the Kansas City Barbecue Society (KCBS) rules for judging meats like ribs and brisket.
- Go to judge training sessions to improve your senses and score meats accurately.
- Join local BBQ events to watch and learn from experienced judges.
- Enjoy the BBQ community’s friendly vibe. Seasoned judges often share their knowledge and support new ones.
By diving into competitive barbecue and learning about judge duties, you’ll make a big impact in this exciting food world.
“The best judges know a lot about barbecue science and art. They also love the craft. Their fairness and integrity make them key to the community.”
Conclusion
Mastering BBQ competition judging is key for any serious pitmaster aiming for the top prize. Knowing what judges look for in appearance, taste, and tenderness can improve your winning BBQ techniques and recipes. This guide has given you a deep dive into the judging process. Now, you’re ready to master the BBQ judging criteria and boost your BBQ skills.
The tips on judging criteria, scoring, and best can change how you approach BBQ competitions. They’re useful whether you’re a pro or new to the game. Using these tips can sharpen your skills, improve your presentation, and help you win the Grand Champion title.
Success in BBQ isn’t just about winning. It’s about your dedication, passion, and always getting better. Keep working on your skills, trying new flavors, and keeping high standards in BBQ competitions. With this attitude, you’ll be a top contender in the BBQ world and gain respect from peers and judges.
FAQ
What are the strict criteria that expert BBQ judges use to evaluate meats in competitions?
Barbecue competitions are big deals. Judges look at the meat’s look, taste, and how tender it is. To win, teams must cook meats that taste great and look good.
What is the process to become a certified BBQ judge?
Becoming a certified BBQ judge is tough. You start with a detailed training by the Kansas City Barbecue Society (KCBS). They’re the top group for competitive barbecue.
What are the four main meat categories judged in KCBS-sanctioned BBQ competitions?
The KCBS runs contests with four main meat types: chicken, pork, pork ribs, and beef brisket. Judges check each dish on taste, tenderness, and how it looks.
How does the BBQ judging process work, from the preliminary to the final rounds?
The judging starts with a first round where entries are tasted and scored by judges. The top ones move to the final round for more judging by new judges.
What are the specific techniques and considerations judges use to evaluate a BBQ entry’s appearance, taste, and flavor profile?
For each meat type, judges have special ways to check the look, taste, and flavor. They look at how the dish is presented and the flavor to pick the winners.
What are the guidelines for achieving the perfect level of meat tenderness that judges are looking for?
Getting the meat just right is key in BBQ contests. Judges want it to be moist and juicy, with just the right feel. There are specific rules for each meat type.
What are the strict rules surrounding the use of garnishes in BBQ competitions?
Using garnishes in BBQ contests has strict rules. Some greens like curly kale are okay, but many others are not allowed. Judges don’t count the garnish’s look when scoring.
How are the “ancillary” categories like beans and chili judged in BBQ competitions?
BBQ contests also have “ancillary” categories like beans and chili. Judges check these dishes for aroma, look, texture, and taste, just like the main meats.
What are the ethical principles and protocols that govern the BBQ judging process?
BBQ judges must be fair and unbiased. They can’t have personal ties or biases towards the teams.
What are the steps to becoming a certified KCBS BBQ judge?
To become a certified KCBS judge, you go through a detailed training program. You also have certain duties and expectations at contests.
Top 10 Essential Tools for BBQ Competitions
Are you a BBQ enthusiast looking to win at competitions? The key to amazing dishes is the tools you use. You need everything from precision basting brushes to top-notch temperature monitors. These tools can take your grilling skills to the next level.
But what tools are a must-have for BBQ success? Let’s explore the essentials that can make a big difference in your BBQ skills.
Key Takeaways
- Invest in high-quality grill brushes and wire-free grate cleaners for efficient surface prep
- Equip yourself with versatile basting brushes, flexible spatulas, and precise tongs for controlled food handling
- Illuminate your night-time grilling with reliable grill lights
- Monitor temperatures with wireless, smart meat thermometers for consistent, perfectly cooked meats
- Ignite your charcoal with efficient starters, no lighter fluid required
Grill Brushes: Scrubbing Surfaces Clean
A good grill brush is key for a clean outdoor cooking area. It’s vital whether you’re hosting a backyard BBQ or entering a grill cleaning tools contest. The right brush helps remove tough, burnt-on food from your wire grill brushes efficiently.
The Bryan Stove Best BBQ Grill Brush is a top choice. It has three rows of thick, strong wire bristles. These bristles quickly clear away even the toughest food bits. Unlike some brushes, this one doesn’t bend or flex, keeping the bristles ready for tough cleaning tasks.
The brush has a 10-inch plastic handle that’s easy to hold and comfortable. It lets you apply the right pressure to clean your grill grates without straining your hands. It works well on hot or cold grates, making it a reliable tool for all grilling stages.
“The Bryan Stove Best BBQ Grill Brush is a game-changer for keeping my grill in top shape. The thick wire bristles make quick work of even the most stubborn grime, and the durable handle gives me the control I need to get the job done right.”
For anyone serious about grilling, the Bryan Stove Best BBQ Grill Brush is essential. It’s perfect for both grill cleaning tools competitions and keeping your grill spotless. Its powerful cleaning and comfortable design make it the best choice for maintaining a clean grill brush.
Wire-Free Grate Cleaners: A Safer Option
Choosing the right tools for cleaning your grill is key to keeping it spotless. Traditional wire brushes work well but can be dangerous – their bristles might break off and get into your food. For a safer choice, wire-free grill cleaning tools are a great option.
The Great Scrape Woody Shovel is a top pick. It has a straight edge made of hardwood that fits your grill grates well. This tool easily removes stuck-on food and char. It also has a hole in the handle for a better grip and smells nice when used.
Using a wooden grill scraper doesn’t risk bristles getting into your food. It’s a safe and effective way to keep your grill clean. This also helps keep your food tasting great.
For a tool that does more, try the Grillaholics Grill Brush and Scraper. It has a wooden handle and a flexible silicone scraper. This lets you clean tough grime safely, keeping your hands away from the heat.
When picking grill cleaning tools, safety should be your main concern. Tools like the Great Scrape Woody Shovel and the Grillaholics Grill Brush and Scraper are safe and reliable. They make sure your barbecue stays clean, making grilling fun and safe.
Essential tools for BBQ competitions: Basting Brushes
Choosing the right tool for basting in BBQ competitions is key. The OXO Good Grips Large Silicone Basting Brush stands out. It has heat-resistant silicone bristles that can handle up to 600°F. This means they won’t melt or leave fibers on your food.
This brush has both round and flat bristles. The round ones hold a lot of sauce, and the flat ones spread it evenly. It’s perfect for basting chicken, ribs, or any dish for a competition. This silicone basting brush is a top BBQ basting tool for a glossy finish.
“The OXO Good Grips Large Silicone Basting Brush is a game-changer for competition grilling. Its heat-resistant design and ample sauce-holding capacity make it a must-have in my BBQ arsenal.”
Spatulas: Flipping Delicacies with Ease
When grilling, the right grilling spatula is key. The Mercer Culinary Hell’s Handle Fish Turner is a top choice for BBQ lovers. It has a flexible yet strong stainless steel blade and a shape that lets you easily slide under food. You can also use it to safely move whole chickens from the grill.
The wide handle of the Mercer Culinary BBQ spatula gives you a firm grip. This means you have better control when flipping steaks or handling fish fillets. This grill turner is perfect for all your grilling tasks.
“The Mercer Culinary Hell’s Handle Fish Turner is the ultimate grilling tool, combining precision and power in one sleek design.”
The Mercer Culinary grilling spatula is ideal for serious grillers. It has a tapered blade, strong build, and a comfortable handle. This makes it great for improving your BBQ skills and making sure your food is cooked just right.
Tongs: Precise Gripping at a Distance
Long grill tongs are key for any BBQ lover. They let you stay away from the hot flames but still control your food perfectly. The 16-inch Winco Heavyweight Stainless Steel Utility Tongs are a great choice.
These tongs focus on comfort and control. They have a moderate spring that stops your hands from getting tired. Their narrow heads are great for picking up small or sticky items, unlike wider tongs that can be tricky.
At 16 inches long, these tongs keep your hands away from the heat. They’re perfect for competitive grilling where you need to stay safe. They don’t have fancy features like a hanging ring, but they’re affordable and work well.
“The Winco Heavyweight Stainless Steel Utility Tongs keep my hands safe from the flames while allowing me to maneuver delicate items with ease. They’re a game-changer for my backyard barbecues.”
For both expert pitmasters and backyard grillers, good long grill tongs can change your cooking. The Winco Heavyweight Stainless Steel Utility Tongs are a solid choice. They offer the control and safety you need for great BBQ results.
Grill Lights: Illuminating Night-Time Grilling
As the sun sets, your outdoor grilling adventures don’t have to end. Adding a grill light can make night grilling great. It’s perfect for perfecting your barbecue ribs or trying new grilling tricks. A good BBQ light is key for your outdoor grilling accessories.
The silicone-banded grill light is a top choice. It clips to your grill handle and shines light on your food. It also stays safe from heat and splashes. Just wipe it clean, and it’s ready for the next time.
“A good grill light is a must-have for any serious outdoor chef. It allows you to keep an eye on your food, even as the sun goes down.”
Getting a quality grill light changes your grilling game. It lets you see what you’re doing at night. You can flip burgers, check temperatures, or add final touches easily. A reliable BBQ light makes your outdoor grilling accessories better and boosts your cooking skills.
Temperature Monitoring: The Meater Plus
For competitive grilling, knowing the exact temperatures is key. The Meater Plus thermometer changes the game. It tracks internal and ambient temperatures, gives the best cooking time, and has a 165-foot range. This lets you watch your meal from a distance.
This device can handle up to 527°F, making it great for the oven, stovetop, and grill. It comes with a compact, dishwasher-safe probe and a magnetic charging case. These features make tracking temperatures easy, letting you focus on making the perfect meal.
“The Meater Plus is essential for serious grillers or those in competition barbecue. It tracks internal and external temperatures and predicts cooking times. This removes the guesswork in getting that perfect cook.”
Key Features of the Meater Plus:
- Measures internal and ambient temperatures
- Calculates optimal cooking time
- 165-foot wireless range
- Withstands temperatures up to 527°F
- Compact, dishwasher-safe probe
- Magnetic charging case for convenient storage
| Feature | Meater Plus | Competitor A | Competitor B |
|---|---|---|---|
| Wireless Range | 165 feet | 100 feet | 50 feet |
| Temperature Monitoring | Internal and Ambient | Internal Only | Internal Only |
| Cooking Time Prediction | Yes | No | No |
| Maximum Temperature | 527°F | 450°F | 400°F |
The Meater Plus is the top choice for wireless meat thermometers, BBQ thermometers, and grilling temperature monitors. It’s perfect for competitive grills or backyard barbecues. It helps you cook dishes perfectly by removing the guesswork.
Kebab Tools: Skewers and Baskets
For a great BBQ competition, the right grilling tools are key. Essential items include grilling skewers and a kebab basket.
Oxo skewers have a flat design to keep meat and veggies from spinning. Their long tips make it easy to skewer your ingredients. This design helps your kebabs cook evenly and look great.
The Grillaholics Grill Basket is another must-have. It’s perfect for grilling small items like shrimp or veggies without them falling through the grates. This basket lets you make amazing kebabs that will wow the judges.
| Tool | Features | Benefits |
|---|---|---|
| Oxo Grilling Skewers | – Flat design to prevent food from spinning – Long, pointed tips to easily pierce ingredients |
– Ensures kebabs stay in place for even cooking – Allows for visually stunning presentation |
| Grillaholics Grill Basket | – Holds smaller items like shrimp or vegetables – Prevents food from falling through grates |
– Expands grilling options beyond large pieces – Helps create delicious, competition-worthy kebabs |
With these special kebab tools, you can take your grilling to the next level. Impress the judges with perfectly cooked, beautiful skewers. Add these key grilling accessories to your BBQ competition arsenal.
Charcoal Starters: Igniting the Flames
For a great BBQ competition, the right charcoal starter is key. The Weber Rapidfire Chimney Starter is a top choice. It lights a full load of charcoal in just 15 minutes, without the need for chemical lighters. This keeps your food tasting great.
This starter’s design is what makes it so efficient. Its compact shape focuses heat well, turning charcoal into glowing embers fast. This saves time and keeps your food tasting smoky and delicious, impressing the judges.
Unlike chemical lighters, the Weber Rapidfire Chimney Starter uses convection to start the coals. This means your BBQ charcoal lighting won’t add any bad tastes to your food. It’s a strong, easy-to-use charcoal starter every serious griller needs.
“The Weber Rapidfire Chimney Starter lights charcoal in 15 minutes without lighter fluid, preventing chemical tastes in your food.”
Whether you’re working on your brisket, steak, or ribs, the chimney starter ensures great results. Boost your BBQ charcoal lighting skills and improve your competitive edge with this must-have tool.
Conclusion
To improve your BBQ skills for competitions, you need the right tools. Essential items include grill brushes, basting brushes, spatulas, tongs, and temperature monitors. These tools are key to making delicious, competition-ready dishes. By getting these top 10 must-have tools, you’ll get closer to winning BBQ competitions and impressing judges with your skills.
The tools mentioned here, like the Bryan Stove Best BBQ Grill Brush and the Meater Plus wireless thermometer, help make your competition prep easier. They ensure you get perfect results whether you’re grilling steaks, basting ribs, or checking meat temperatures. These tools will become crucial in your journey to BBQ success.
As you keep improving your BBQ skills and recipes, remember, the right tools matter a lot. Use these top-notch accessories to help you win on the BBQ circuit. With skill and the right equipment, you’re on your way to becoming a BBQ star.
FAQ
What are the essential tools for BBQ competitions?
For BBQ competitions, you need smoker grills, meat thermometers, and basting brushes. Don’t forget tongs, spatulas, wood chips, and rubs. Also, have insulated coolers, knife sharpeners, and grill gloves on hand.
What is the best grill brush for efficient cleaning?
The Bryan Stove Best BBQ Grill Brush is top-notch. It has three rows of thick wire bristles. These effectively remove carbonized bits and stuck-on sauce from hot grates.
What is a safe alternative to wire grill brushes?
The Great Scrape Woody Shovel is a great choice. It’s a wire-free way to clean your grill. It uses a hardwood paddle with a straight edge for effective cleaning.
What is the best basting brush for BBQ competitions?
The OXO Good Grips Large Silicone Basting Brush is excellent. It has heat-resistant silicone bristles. Plus, it has both round and flat bristles for lots of sauce.
What is the best spatula for grilling and competition BBQ?
The Mercer Culinary Hell’s Handle Fish Turner is ideal. It’s flexible and strong with a fine-edged blade. Its shape makes it stable for grilling.
What are the best tongs for competition grilling?
The 16-inch Winco Heavyweight Stainless Steel Utility Tongs are great. They offer comfort, dexterity, and are long enough to keep your hands away from flames. Their narrow heads give you precise control.
How can a grill light improve competition grilling?
A good grill light, like one with a silicone band for the grill handle, helps a lot. It shines light on your cooking surface. This makes it easier to flip food, read a thermometer, or add toppings in dim light.
What is the Meater Plus and how does it help with temperature monitoring?
The Meater Plus is a wireless thermometer. It measures internal and ambient temperatures and calculates cooking time. It has a 165-foot range, letting you monitor your meal from afar.
What tools are essential for grilling kebabs?
For kebabs, you need Oxo skewers with a flat design to keep food steady. Also, the Grillaholics Grill Basket is key for grilling small items safely.
What is the best charcoal starter for competition grilling?
The Weber Rapidfire Chimney Starter is a must-have. It lights a full load of charcoal in 15 minutes, without using chemical lighter fluids. This keeps your food tasting great.
How to Choose the Best Smoker for BBQ Competitions
Are you ready to boost your competitive barbecue skills? The key to winning top prizes in ribs, brisket, and more is the right equipment. With many smokers available, picking the best one for your BBQ competitions can be tough. Let’s uncover the secrets to finding the perfect smoker for you.
Key Takeaways
- Understand the unique features and benefits of different smoker types like drum smokers, pit barrel cookers, and gravity-fed smokers.
- Learn how to evaluate factors like temperature control, fuel efficiency, and ease of use when selecting a competition-grade smoker.
- Discover top-rated smoker models from trusted brands that have earned a reputation for delivering award-winning results.
- Explore essential smoker accessories and customizations that can take your competition game to new heights.
- Get insider tips from seasoned pitmasters on how to choose and master the best smoker for your BBQ competitions.
Understanding Drum Smokers
If you’re a competitive professional-grade smoker aiming to improve your BBQ skills, consider drum smokers. These cookers, made from 55-gallon steel drums, are great for high-heat cooking. This is key for winning in competition-level smokers.
What are Drum Smokers?
Drum smokers use a strong steel drum modified for smoking. Their vertical shape and heavy build ensure great heat and smoke flow. This makes meats tender and full of flavor – perfect for BBQ contests.
Benefits of Drum Smokers for Competition BBQ
- Exceptional temperature control and stability, crucial for the “hot and fast” cooking methods preferred by many competitive pitmasters
- Efficient heat and smoke circulation for consistently tender and flavorful meats
- Durable, high-quality construction that can withstand the rigors of competitive professional-grade smoker use
- Versatile design that allows for easy customization and modifications to suit individual cooking styles and preferences
Top competition-level smokers often use drum smokers for their winning recipes. If you’re serious about improving your competitive smoking, a drum smoker could be your game-changer. It could help you become an elite smoker.
“The vertical design and steel construction of drum smokers allow for efficient heat and smoke circulation, resulting in consistently tender and flavorful meats.”
Pit Barrel Cooker: A Starter Drum Smoker
The Pit Barrel Cooker is a great choice for those new to BBQ competitions. It’s easy to use and has a design perfect for beginners. This cooker is ideal for those stepping into the competitive BBQ world.
Features and Functionality
This cooker has a charcoal basket at the bottom and hanging rods or grill grates for cooking. You can adjust the air intake to control the temperature. It usually stays between 250-300°F, which is perfect for BBQ competitions.
Pros and Cons
The Pit Barrel Cooker is affordable and easy to use, offering consistent cooking results. But, it may not have the advanced features of more expensive smokers, like precise temperature control or mobility. Cleaning it can also be harder than other models with ash pans.
If you’re starting out in BBQ competitions, the Pit Barrel Cooker is a great choice. It’s simple, reliable, and helps you improve your BBQ skills. It’s a solid base for competing at the top level.
Oklahoma Joe’s Bronco: A Mid-Range Option
If you’re looking for a smoker for BBQ championships or a great choice for competition BBQ, the Oklahoma Joe’s Bronco is a good pick. It’s a mid-range smoker with advanced features loved by competitive pitmasters.
Air Intake and Temperature Control
The Bronco stands out with its side-mounted air intake pipe. This feature lets you control the temperature precisely while smoking. It also has a built-in temperature gauge to keep an eye on the internal temperature.
This ensures your meats are cooked just right. The smoker’s design, with its attached lid and hinged access, makes checking on your food easy. This is a big plus for those competing in BBQ events.
Cleaning and Mobility
Keeping your smoker clean is key for great BBQ, and the Bronco makes it easy. It has a bottom-mounted grease drain for quick cleanup. However, while it’s mobile with metal wagon-style wheels, it might not be the best for delicate trailers or surfaces.
The Oklahoma Joe’s Bronco is a mid-range drum smoker that boosts your BBQ game. It has more features and better performance than basic models. It’s a strong choice for those aiming for top spots in BBQ competitions.
Gravity Fed Smokers: The Best smoker for BBQ competitions
For competitive BBQ events, gravity-fed smokers from Stump, Yoder, and Jambo are top picks. These smokers stand out with their vertical design. They are perfect for the BBQ competition circuit.
How Gravity Fed Smokers Work
These smokers use a charcoal chute to feed fresh charcoal into the firebox. This keeps the temperature steady with little effort from the user. It lets pitmasters focus on smoking and flavoring meats without worrying about the fire.
Popular Gravity Fed Smoker Brands
- Stump Smokers are known for their top-notch build and precise temperature control. They are a favorite among serious BBQ competitors.
- Yoder Smokers are famous for their durability and keeping temperatures steady for a long time. This is key for consistent results in big competitions.
- Jambo Smokers are known for their innovative features and focus on detail. They are considered some of the best for tough BBQ competitions.
These smokers are loved by competitive pitmasters for their gravity-fed mechanism and precise temperature control. They need to keep temperatures steady for a long time. The Stump, Yoder, and Jambo brands are known for their quality, durability, and performance in top BBQ competitions.
Stick Burners: The Cadillac of BBQ Smokers
Stick burners are top-notch smokers for serious BBQ fans. They are often called the “Cadillac” of smokers. These smokers have a separate firebox and cooking area. This setup lets pitmasters control the temperature and smoke perfectly by managing the fuel.
Stick burners need more attention than other smokers but are loved by BBQ pros. They make professional-quality food. The design lets pitmasters adjust the temperature and smoke levels. This ensures their dishes taste great and look perfect for contests.
“Stick burners are the gold standard for serious competition BBQ. The level of control they offer is unmatched, allowing you to coax every last bit of perfection out of your meats.”
Models like Jambo and Yoder are famous for their quality and performance. These competition-level smokers are made for the tough world of BBQ contests. They give pitmasters the precision and reliability they need.
For those looking to improve their BBQ skills for competitions, a top stick burner is a great choice. With skill and knowledge, these professional-grade smokers can take your BBQ to the next level. They can help you win championships.
Pellet Smokers: Convenience and Versatility
If you’re looking for top-notch smokers for BBQ competitions, check out Green Mountain Grills. These pellet smokers are great for serious BBQ fans. They offer ease and flexibility for pitmasters.
Popular Pellet Smoker Brands
Drum and stick burners are common, but pellet smokers are becoming more popular. Traeger, Pit Boss, and Z Grills lead the market with their variety of models. They meet different cooking needs.
Green Mountain Grills: A Recommended Choice
Green Mountain Grills stand out in the pellet smoker world. They’re known for their precise temperature control and consistent results. This is key for BBQ competitions.
Their smokers are easy to use and let you focus on other things. Green Mountain Grills are a smart pick for pitmasters wanting a simpler way to cook.
Even though they’re not as common as other smokers, Green Mountain Grills can still deliver great BBQ. They’re easy to use and keep a steady temperature. This makes them a good choice for pitmasters wanting versatility and ease.
Factors to Consider When Choosing a Smoker
Choosing the right smoker for your BBQ competition is key. Top smokers for BBQ championships and award-winning ones share two main qualities. These are precise temperature control and stability, and fuel efficiency and ease of use.
Temperature Control and Stability
Getting the temperature right is crucial for perfect BBQ. The best smokers for competitions have precise temperature controls. This lets you adjust the cooking environment as needed.
Look for smokers with digital thermometers, adjustable vents, and heat deflectors. These features help keep the temperature steady during cooking.
Fuel Efficiency and Ease of Use
Long cooking times are common in BBQ competitions. So, fuel efficiency is important. The best smokers use less fuel and keep the heat in, saving you time and resources.
Easy-to-use features like simple controls, mobility, and quick cleanup are also key. They help you perform well under pressure in competitions.
Focus on temperature control, fuel efficiency, and ease of use to pick the best smoker. This will help you win in your next BBQ competition.
Smoker Accessories and Upgrades
As a serious BBQ fan, you know picking the best smoker is just the start. To really step up your game in BBQ contests, getting the right accessories and custom parts is key. These can help you get top-notch results.
Temperature Controllers and Blowers
Keeping the temperature steady is crucial for delicious, tasty meats. Tools like the BBQ Guru temperature controller make this easy. They automatically keep your smoker at the perfect heat. Blowers from the same brand improve airflow for even better temperature control.
Customizations and Modifications
Many pitmasters also like to make their smokers their own. This might mean adding custom shelves, changing doors, or even putting in a pop-out TV. These changes make using your smoker better and help you meet the needs of BBQ contests.
With the right accessories and upgrades, your smoker can become a top contender. You’ll have everything you need to win BBQ competitions. These tools will help you make dishes that wow judges and other BBQ fans.
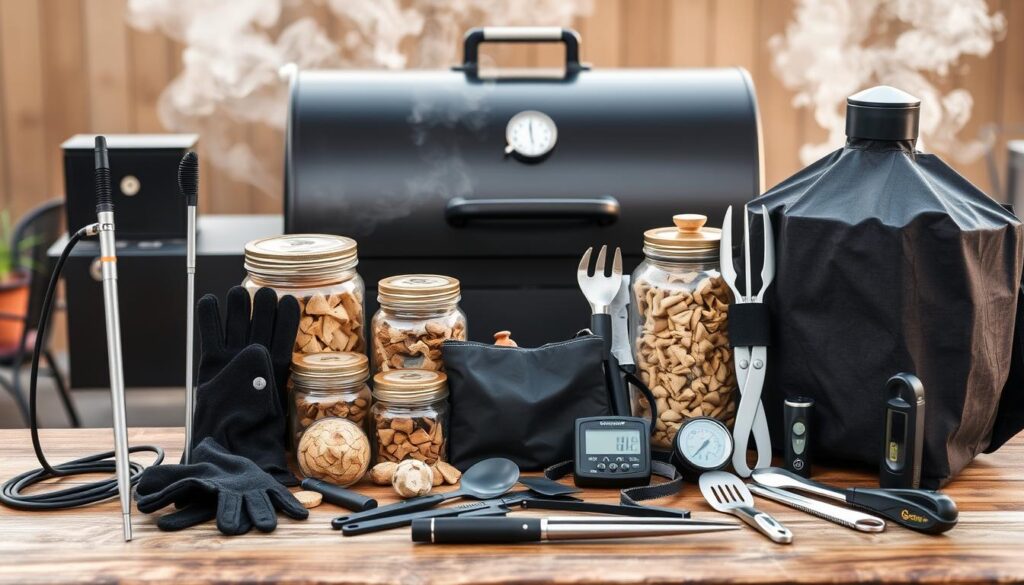
Tips from Seasoned Pitmasters
Entering the world of competitive BBQ can be tough, but seasoned pitmasters offer great advice. These experts have spent years perfecting their craft. They’re ready to share their knowledge with newcomers.
One top tip is to go to as many BBQ competitions as you can. Do this as a competitor and a spectator. This way, you’ll see many premier smokers for BBQ competition circuit up close. You’ll learn about their features and what they can do.
“Don’t be afraid to try out different types of smokers. What works best for one team may not be the perfect fit for your cooking style and competition needs.”
Choosing the right smoker isn’t easy. It depends on your team size, the meats you cook, and the competition rules. Being open to different smokers and willing to try them out is key. This approach can help you find the best smoker for your BBQ goals.
| Pitmaster Insights | Recommendations |
|---|---|
| Attend BBQ competitions | Observe different types of smokers in action |
| Try out various smoker models | Determine the best fit for your team and cooking style |
| Understand competition-specific requirements | Choose a smoker that meets the event’s guidelines |
Listening to seasoned pitmasters and being open to new things can boost your chances. It can lead you to the perfect elite smokers for championship BBQ cooking. These smokers will help you shine in the competitive BBQ world.
Conclusion
Choosing the best smoker for BBQ competitions is key to winning or losing. It doesn’t matter if you’re a pro or just starting. Knowing about different smokers, like drum, stick burners, and gravity-fed ones, helps you pick the right one for you.
Looking into the features and benefits of various smokers can set you up for success in BBQ contests. The right smoker can boost your skills and help you reach your goals in competitions. Whether it’s versatile smokers or top-rated ones, the right gear makes a big difference.
Start your journey, try out different smokers, and let your BBQ passion show. With the right tools and hard work, you’re on your way to BBQ success. The path to greatness is clear.
FAQ
What are the key features to look for in a smoker for BBQ competitions?
When picking a smoker for BBQ contests, focus on temperature control, fuel efficiency, and ease of use. Keeping a steady temperature is key for the perfect texture and flavor. This is what judges look for.
What are the benefits of using a drum smoker for competitive BBQ?
Drum smokers are great for keeping temperatures steady, which is important for quick and hot cooking. Their design and material help circulate heat and smoke well. This makes the meat tender and full of flavor.
What are the advantages and disadvantages of the Pit Barrel Cooker for competition BBQ?
The Pit Barrel Cooker is a great choice for beginners. It’s affordable, easy to use, and cooks food well every time. But, it doesn’t have some features of more expensive smokers, like precise temperature control or easy cleaning.
What makes the Oklahoma Joe’s Bronco a mid-range drum smoker option for competitive pitmasters?
The Oklahoma Joe’s Bronco has more features than the Pit Barrel Cooker. It has a special air intake and a built-in temperature gauge. This makes controlling the temperature easy. It also has a design that makes checking on your food simple. Plus, it keeps temperatures steady and has a special grate system.
Why are gravity-fed smokers like Stump, Yoder, and Jambo considered among the best options for competitive BBQ?
Gravity-fed smokers work by feeding charcoal into the firebox automatically. This keeps the temperature steady with little effort from you. This is why competitive pitmasters like them for their precise temperature control.
What are the advantages of using a stick burner for competitive BBQ?
Stick burners, like the Jambo and Yoder, are top choices for BBQ. They have a separate firebox and cooking area, letting you control the temperature and smoke easily. They need more attention but are loved for their great results.
How can pellet smokers be used in competitive BBQ?
Pellet smokers, like the Green Mountain Grills model, can also do well in competitions. They’re easy to use and keep temperatures steady. This makes them a good choice for pitmasters who want a simpler approach.
What accessories and upgrades can competitive pitmasters use to enhance their smokers?
Pitmasters often add accessories to improve their smokers. Things like temperature controllers and blowers, like the BBQ Guru, help control the temperature better. Custom parts, like special shelves or doors, can also be added to fit a team’s needs.
What advice do seasoned competitive pitmasters have for choosing the right smoker?
Experienced pitmasters suggest trying out different smokers and talking to other competitors. There’s no one smoker that fits everyone. The best one depends on your team size, the meats you cook, and the competition rules.
How to Smoke Meat for BBQ Competitions: Tips from the Pros
If you love BBQ and dream of winning your next competition, learning to smoke meat is key. BBQ competition smoking techniques need precision and skill. By learning from experts, you can improve your skills and make meats that are full of flavor and tender.
This guide will share the secrets of how to prepare meat for bbq competitions. We’ll cover choosing the right cuts, prepping them, and setting up your smoker. These tips are great for both new and experienced BBQers. They’ll help you improve your skills and win your next BBQ competition.
Get ready to learn the best wood for smoking competition bbq. You’ll also get winning bbq competition tips from experts. And discover bbq competition brisket techniques that will impress the judges. With practice and the right approach, you could become a bbq competition champion.
Introduction
Starting your journey in competition barbecue is thrilling. It’s all about picking the best meat and learning to smoke and present it perfectly. Every step is important to make your dishes stand out. This guide will teach you what makes competition BBQ different from backyard grilling. You’ll learn how to be a top contender in the smoky arena.
If you’re new or experienced in competition BBQ, this guide is for you. It will help you understand what judges look for. With this knowledge, you can make barbecue that wows everyone with its taste and look.
Distinguishing Competition BBQ
Backyard barbecues are fun and casual, but competition BBQ is on a different level. The competition is tough, and judges want the best flavor, texture, and look. They look for perfection in every dish.
- Elevated Flavor Profiles: Competitors must show off their skills with rubs, marinades, and smoking techniques for great taste and balance.
- Meticulous Presentation: How your dish looks is just as important as how it tastes. Judges like perfect plating and details.
- Consistent Performance: Judges want dishes that are always great, every bite as good as the last.
To do well in competition BBQ, you need to know these special rules. You also need to be ready to improve your skills to meet the judges’ high standards.
Impressing the Judges
Judges are the heart of competition BBQ. They decide who wins with their sharp taste and keen eyes. Knowing what they like is key to winning. It’s about making dishes that taste great and look good.
| Judging Criteria | Description |
|---|---|
| Appearance | The dish’s look, including color, texture, and how it’s presented. |
| Taste | The flavor, seasoning balance, and depth of taste. |
| Tenderness | How tender and juicy the meat is, showing the pitmaster’s skill. |
| Originality | The creativity and new ideas in the dish. |
Knowing what judges look for and adjusting your approach can help you win. This will put you on the path to success.
Understanding Competition BBQ
Exploring competition BBQ reveals a world full of excitement. It’s different from the casual grilling at home. Here, the aim is to create bold flavors that impress expert judges.
What Makes Competition BBQ Different?
Professional pitmasters use special techniques in competition BBQ. They use injections, complex dry rubs, and the “Texas Crutch” to make meats taste intense and feel just right. These methods work great in competitions but might be tricky to use at home.
Knowing Your Judges
It’s important to know how judges evaluate BBQ in competitions. They are volunteers with different levels of BBQ knowledge. Cooks need to make dishes that meet their tastes. Judges look for tenderness, juiciness, and flavor, not just personal likes. Making dishes that fit what judges want can make a big difference in the results.
| Backyard BBQ | Competition BBQ |
|---|---|
| Casual, approachable flavors | Bold, distinctive flavors |
| Relaxed cooking techniques | Advanced techniques (injections, rubs, Texas Crutch) |
| Personal taste preferences | Catering to judges’ assessment criteria |
“In competition BBQ, the goal is to produce meats that stand out to the judges, even if they may not be the most approachable for the average backyard enthusiast.”
Choosing the Right Meat
In competition BBQ, the meat you pick can be the difference between winning and losing. Pitmasters know that choosing the best cuts is crucial. They look for meats like juicy brisket, tender pork shoulder, and perfectly cooked ribs. The right meat can take your dish to the next level.
Selecting the Best Cuts
Choosing the right cuts is key to winning in competition BBQ. For brisket, go for well-marbled, USDA Choice or Prime beef. This type stays moist and tender even after slow smoking. For pork shoulder, choose bone-in cuts with a good fat layer. This fat helps baste the meat as it cooks. And for ribs, pick racks with uniform thickness and little connective tissue.
Sourcing Quality Meat
- Look for specialty meat markets or online stores that specialize in competition-ready cuts. These places often work closely with farmers and ranchers to ensure top-quality meat.
- When shopping in person, check the meat for quality signs like bright color, firm texture, and few blemishes.
- Order your meats early, as the best cuts can be in high demand.
| Meat Cut | Ideal Characteristics | Where to Buy |
|---|---|---|
| Brisket | USDA Choice or Prime grade, well-marbled | Specialty meat markets, online purveyors |
| Pork Shoulder | Bone-in, with a nice layer of fat | Local butchers, farmers markets |
| Ribs | Competition-grade, uniform thickness, minimal connective tissue | Online specialty retailers, select grocery stores |
By picking the best cuts and getting them from reputable suppliers, you’re on your way to making award-winning BBQ. These dishes will impress even the toughest judges.
Preparing Your Meat for Success
In competition BBQ, getting your meat ready is crucial. Pitmasters know how to trim, marinate, and rest their meats for the best flavor and tenderness. These steps are key to impressing judges and winning.
Trimming Techniques
Trimming off extra fat and silver skin is a vital step. It makes the meat look better and helps it soak up flavors. It takes time and practice, but it’s worth it. Learning to trim meats right is a must for BBQ pros.
Marinades, Rubs, and Brines
- Marinades add flavor and make the meat tender and juicy.
- Rubs give a tasty crust and keep the juices in.
- Brines add moisture and subtle flavors.
Trying out different marinades, rubs, and brines is part of finding the best taste for your BBQ meats.
Resting and Prepping
After trimming and seasoning, let the meat rest and warm up before smoking. Resting helps the flavors blend and the juices spread evenly. Making sure the meat and smoker are ready is also crucial for success.
“The secret to competition-worthy BBQ lies in the preparation. Trim, marinate, and rest your meats with care, and you’ll be well on your way to securing that coveted grand champion title.”
Mastering Your Smoker
Winning a BBQ competition is not just about cooking tasty meat. It’s about mastering the art of smoking. Pitmasters use special smokers for “hot and fast” cooking at high temperatures. Knowing how to pick the right smoker, set it up, control the temperature, and choose the best wood is key.
Choosing the Right Smoker
The smoker is the core of your BBQ setup for competitions. Pick a high-quality smoker that keeps temperatures steady and smokes perfectly. Look for features like precise temperature control, efficient airflow, and enough space for your meat.
Setting Up Your Smoker
Setting up your smoker right is vital for good results. Learn your smoker’s unique features and try different setups to find what works best. Focus on airflow, fuel placement, and meat position for even cooking and smoke.
Managing Temperature
Keeping the right temperature is crucial for competition BBQ success. Pitmasters watch their smokers closely, adjusting as needed. Practice helps, but a reliable digital thermometer and knowing your smoker can keep your cooking spot-on.
Best Wood for Smoking
The wood you use affects your meat’s flavor. Woods like oak, hickory, or mesquite add unique tastes. Try different woods to match your rubs and cooking methods.
Mastering your smoker is key to winning BBQ competitions. With the right gear, setup, temperature control, and wood choice, you’ll make meats that judges love.
Smoking Techniques for Perfection
Top pitmasters use special smoking methods to get perfect BBQ results. They use the “texas crutch” and check meat temperatures carefully. These techniques help bring out the best flavor and texture in smoked meats.
The Texas Crutch
The “texas crutch” is a favorite among BBQ pros. It means wrapping meat in foil to keep it moist and cook faster. This method makes the meat tender inside and crispy outside.
Achieving the Perfect Smoke Ring
- To get that pink smoke ring, pitmasters control the smoker’s fuel and airflow.
- They use woods like oak, hickory, or maple to create the right mix of oxygen and smoke. This gives flavor and makes the meat look great.
Monitoring Internal Temperature
Keeping an eye on meat temperature is key in BBQ competitions. Pitmasters use precise thermometers to check the meat’s internal temperature. This ensures it’s cooked just right without drying out.
Adding Layers of Flavor
Great BBQ cooks add extra flavors with basting and choosing the right wood. Brushing on sauce or mop at the end can make the meat taste even better. Using woods like hickory or mesquite adds unique flavors.
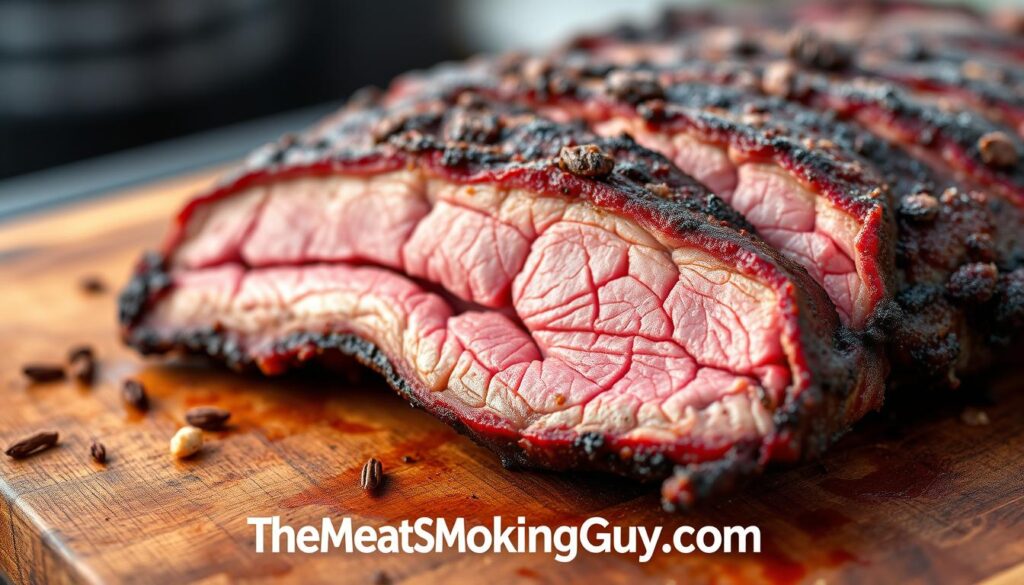
“The secret to competition-worthy smoked meats is in the details – from the texas crutch to temperature monitoring, every technique counts when you’re aiming for that perfect bite.”
– Pit Master, John Smith
Finishing and Presentation
As the competition BBQ journey nears its climax, the final stages of preparing and presenting your smoked meats become crucial. Pitmasters have honed their techniques to perfectly finish their competition-ready cuts. Whether it’s a final sauce, glaze, or seasoning, it’s all about the details. A carefully curated presentation can make all the difference when it comes to impressing the judges.
Finishing the Meat
The last steps before plating can make or break your competition BBQ entry. Some pitmasters prefer to apply a thick, flavorful sauce in the final minutes of the cook. Others opt for a lighter glaze or a final dusting of spices. Timing is key – you want the flavors to meld seamlessly without overpowering the natural taste of the meat.
Plating for the Judges
When it comes to how to finish competition bbq meats, presentation is just as critical as the cooking process. Carefully arrange your sliced or pulled pork, beef brisket, or chicken on the serving tray. Ensure each piece is evenly spaced and visually appealing. Tips for plating competition bbq may include adding a drizzle of sauce, sprinkling on fresh herbs, or strategically placing pickles or onions for pops of color.
Final Touches
The final touches for competition bbq presentation can be the difference between a mediocre and a show-stopping entry. Consider adding a garnish, such as a lemon wedge or a sprinkle of chopped chives, to elevate the dish. Paying attention to the smallest details, like ensuring your tray is spotless and your serving utensils are polished, can demonstrate your commitment to perfection.
| Finishing Technique | Pros | Cons |
|---|---|---|
| Sauce Application | Adds a bold, flavorful coating | Can overpower the meat’s natural taste |
| Glazing | Provides a shiny, caramelized finish | Requires careful timing to avoid stickiness |
| Dry Seasoning | Enhances the meat’s natural flavors | May not provide a visually striking presentation |
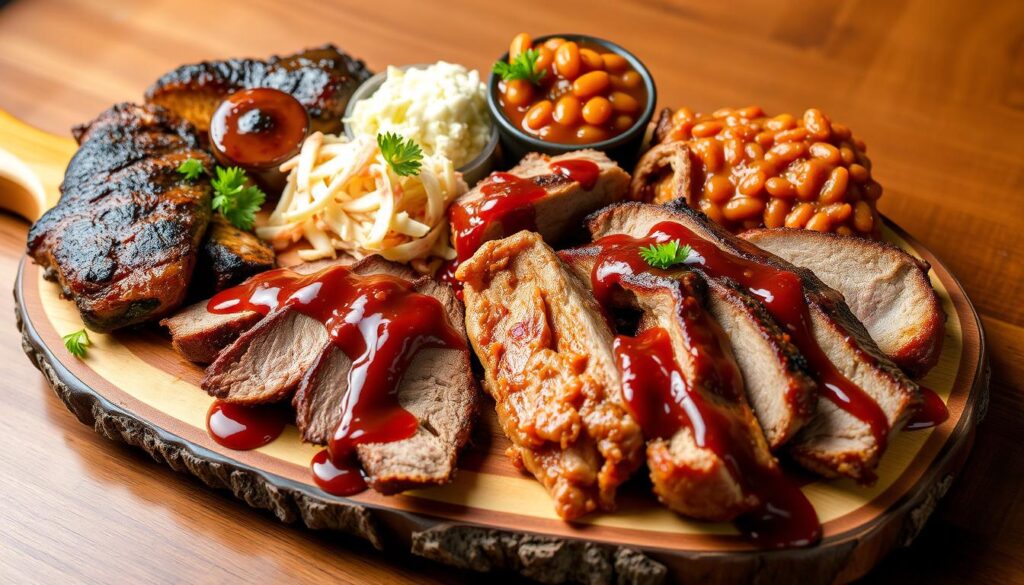
“The final touches can make all the difference in a competition. Attention to detail is key – from the way the meat is arranged to the garnishes used. It’s all about creating a visually stunning presentation that complements the flavor profile.”
– Pitmaster Sarah Johnson
Troubleshooting Common Problems
Even the most skilled BBQ masters face issues like dry meat, too much smoke, and unstable temperatures. But, with the right fixes, these problems can be solved. This ensures your BBQ is always top-notch for competitions.
Dealing with Dry Meat
Dry meat is a big problem in competition BBQ. It can lose you points with the judges. To fix this, keep your meats moist by trying different marinades, brines, and basting methods. Also, don’t overcook your meats to prevent dryness.
Preventing Over-Smoking
Getting the right smoky flavor can sometimes mean too much smoke. This can make your meat taste bitter or too strong. To avoid this, watch how much wood you use and adjust the smoke levels. Try different wood types and blends to get the flavor just right.
Correcting Temperature Fluctuations
Keeping your BBQ smoker at a steady temperature is key for great results. Fluctuations can make your meat cook unevenly, affecting its texture and taste. Use a good digital thermometer and check the temperature often. Adjust it as needed to stay in the right range.
By solving these common issues with effective methods, you’ll make BBQ that wows judges and impresses everyone else too.
Practice Makes Perfect
Competing at the top in BBQ requires hard work and practice. Successful pitmasters stress the importance of practice for competition BBQ. They also talk about logging smoking sessions and learning from past experiences.
Why Repetition is Key
Getting better at BBQ takes time and steady practice. By repeating your techniques and tweaking them, you improve. Trying new methods helps you reach top-level results. The more you smoke, the more you learn about your gear, different meats, and small changes that matter.
Keeping a Smoking Log
- Keeping detailed records is key for tracking your progress and learning from past experiences.
- Log every detail of your smoking sessions, like the meat type, temperatures, cooking times, wood used, and any other notes.
- Looking back at your log helps you see what worked and what didn’t. This guides your future competition strategies.
Learning from Each Competition
Even top competitors can get better. See each BBQ competition as a chance to learn and grow. Look at how you did, get feedback from judges, and pinpoint areas to improve. Learning from each competition is crucial for boosting your skills and winning in the long term.
| Metric | Importance for Competition BBQ |
|---|---|
| Repetition | Key for mastering techniques and being consistent |
| Smoking Log | Helps track progress and learn from past experiences |
| Learning from Competitions | Essential for ongoing improvement and success |
“The more you smoke, the more you’ll learn about your equipment, the nuances of different meats, and the subtle adjustments that can make all the difference.”
Conclusion
This article has given a full look at how top pitmasters win BBQ contests. It covered the special needs of competition BBQ and how to smoke meat well. Now, readers know how to boost their BBQ skills and maybe even enter contests.
Recap of Key Points
We talked about picking the best meat cuts, seasoning, and marinades. We also looked at choosing the right smoker and wood. By using these competition BBQ tips, you’re ready to make BBQ that wins awards.
Call to Action
Now, it’s time to try these tips out. Experiment with different recipes and equipment to see what suits you best. Remember, getting better takes practice, so start entering contests to learn and get feedback.
Offer Additional Resources
For more on competition BBQ, check out online forums, BBQ blogs, and training programs. Learning more and always improving your skills is crucial for success in BBQ contests.
FAQ
What makes competition BBQ different from backyard BBQ?
Competition BBQ is all about making bold, flavorful meats that impress judges. Techniques like injections, rubs, and the Texas Crutch are used. These methods might not work well at home. It’s important to know what judges look for to win.
How do I select the best cuts of meat for competition BBQ?
Pitmasters look for top-quality brisket, pork shoulder, and ribs for competition. Finding the best meats and knowing how to check them is key.
What are the key techniques for preparing competition BBQ meats?
Pitmasters trim meats carefully, use custom marinades, rubs, and brines for flavor. Resting and prepping the meat before smoking is crucial. It can make or break a competition entry.
How do I choose and set up the right smoker for competition BBQ?
Pitmasters use drum smokers for “hot and fast” cooking at high temperatures. Picking the right smoker, setting it up right, and managing the temperature are important skills. Choosing the best wood for smoking is also key.
What are some of the specialized smoking techniques used in competition BBQ?
Techniques like the “Texas Crutch” of wrapping meats in foil and monitoring temperatures are used. Adding flavor with wood selection and basting can help competitors stand out.
How important is the final presentation and finishing of competition BBQ meats?
The final stages are crucial. Pitmasters perfect their meats with techniques like saucing, glazing, or final seasoning. How they present their meats to judges is also important. Careful plating and final touches can make a difference.
What are some common challenges faced in competition BBQ, and how do you overcome them?
Pitmasters face challenges like dry meat, over-smoking, and temperature issues. Knowing how to fix these problems is key for consistent, quality entries.
How important is practice and continuous learning for competition BBQ?
Practice and learning are vital for pitmasters. Keeping smoking logs and learning from each competition helps improve skills. Even experienced competitors can always get better.
